Blog

09.24.2026
Written by arcmaster

The Complete Welding PPE Checklist for Every Shop

Ask a welder about the worst day they’ve had on the job, and there’s a good chance it involved equipment that didn’t do its job.

Maybe a spark slipped through a loose sleeve. Maybe a glove got too hot during a long stick weld. Maybe someone finished a grinding job with a face full of dust because their eye protection was sitting on the other side of the shop.

Most PPE problems aren’t caused by a lack of equipment. They’re caused by having the wrong equipment for the job, using worn-out gear, or skipping something because the task seems quick.

The right welding PPE clothing doesn’t have to be complicated. You need equipment that matches the process, the material, the heat, and the hazards around you. Here’s a practical look at the welding apparel and protective gear most shops should have on hand, from helmets and gloves to boots and respiratory protection.

Start With the Helmet and Eye Protection

Your helmet is one of the first pieces of welding protective equipment to think about, but it shouldn’t be the only thing protecting your eyes and face.

An auto-darkening welding helmet makes it easier to work across different processes without constantly changing lenses. Make sure the helmet offers the appropriate shade range for the work you’re doing and that the lens is in good condition.

A basic setup should include:

  • An auto-darkening welding helmet with the appropriate shade range
  • Safety glasses with side shields worn under the helmet
  • A face shield for grinding and certain cutting tasks
  • Replacement cover lenses when the existing lens becomes scratched, cloudy, or pitted

Safety glasses still matter when you’re wearing a welding helmet. Grinding, chipping, and material handling can send debris in directions you don’t expect. A scratched cover lens can also make it harder to see your work clearly, which is a good reason to replace it instead of working around the problem.

Don’t Use the Same Gloves for Every Process

Welding gloves are another area where one-size-fits-all doesn’t really work.

A heavy leather glove that feels perfectly reasonable while running stick electrodes can make TIG welding frustrating. TIG requires more control and dexterity, so a thinner glove is usually more practical. MIG falls somewhere in between.

Consider keeping several styles available:

  • TIG gloves: Lightweight leather or goatskin for better feel and dexterity
  • MIG gloves: Medium-weight leather with enough protection for heat and spatter
  • Stick welding gloves: Heavier leather with longer cuffs for additional heat and arm coverage
  • Cutting gloves: Gloves appropriate for the heat and handling hazards involved in plasma or other cutting work

Having several options available also means welders don’t have to make a bad compromise just because it’s the only glove in the locker.

And don’t forget to inspect gloves regularly. A glove with a hole, badly worn palm, or damaged stitching isn’t doing much to protect the person wearing it.

Choosing the Right Welding Apparel

Flame-resistant clothing is a basic part of a welding PPE program. The right choice depends on the process and the amount of heat, sparks, and spatter involved.

For heavier welding work, a welding jacket or leather sleeves can provide useful protection. In other situations, an FR shirt may be more comfortable while still providing appropriate protection for the task.

Common options include:

  • FR welding jackets
  • Leather-sleeved jackets
  • FR shirts and other appropriate long-sleeve workwear
  • Leather aprons for higher-spark applications
  • Welding sleeves and bibs when full-body coverage isn’t necessary

Fit matters, too. Loose clothing can create additional hazards around sparks, hot work, and equipment. At the same time, workers need enough room to move comfortably and perform the job without constantly adjusting their clothing.

A shop running heavy stick welding all day may need a very different mix of welding apparel than a shop primarily doing light TIG work. Before buying a large quantity, look at what your welders actually do during a typical shift.

Respiratory and Hearing Protection Matter Too

Welding fumes and shop noise don’t always get the same attention as burns or eye injuries because the effects aren’t necessarily immediate.

That doesn’t make them less important.

Welding fumes can vary considerably depending on the base metal, coatings, consumables, and process. Good ventilation and local exhaust are important parts of controlling exposure. Respiratory protection may also be necessary in certain situations, but the appropriate respirator and filter should be selected based on the actual hazards and your workplace’s respiratory protection program rather than treating one type of mask as a universal solution.

Hearing protection is worth considering around grinders, plasma tables, cutting equipment, and other consistently noisy operations. Earplugs or earmuffs are simple additions to a shop’s safety setup and can make a noticeable difference over time.

Don’t Forget Your Feet and the Smaller Items

Some of the most useful welding safety gear isn’t necessarily the equipment people talk about first.

Leather work boots with appropriate toe protection can help protect against dropped material, sparks, and hot debris. Avoid footwear with exposed mesh or other materials that aren’t appropriate for the work environment.

Other useful items include:

  • Welding blankets for protecting nearby surfaces and equipment
  • Welding curtains for controlling sparks, UV radiation, and the work area around an arc
  • Appropriate head and neck protection for overhead work
  • FR hoods or other suitable protection when the job creates an overhead spark hazard

The small stuff tends to get overlooked because it doesn’t seem important until the day it is.

Your PPE Should Match the Welding Process

Different welding and cutting processes create different hazards, so your PPE setup should change with the job.

Mig Welding can produce significant heat and spatter, particularly at higher settings. Appropriate gloves, FR clothing, eye and face protection, and footwear are important.

Stick Welding generally produces more spatter and heat, so heavier gloves and additional arm or body coverage may be appropriate depending on the application.

TIG Welding usually requires more dexterity. A lighter glove can make it easier to control the torch and filler material while still providing appropriate protection.

Plasma Cutting brings its own combination of hazards, including heat, sparks, flying particles, noise, and fumes. Eye and face protection, appropriate gloves and clothing, and effective ventilation or local exhaust all need to be considered.

There isn’t one perfect PPE setup that works for every job in the shop. The better approach is to have the right options available and make the selection based on the work being performed.

Build a PPE Checklist That Works for Your Shop

Putting together a welding PPE clothing program doesn’t need to mean filling a storage room with every product imaginable. Start with the processes your team actually uses and identify the hazards associated with each one.

At a minimum, most welding shops should think through helmets, safety glasses, gloves, FR clothing, footwear, hearing protection, ventilation, respiratory protection where required, and equipment such as welding curtains and blankets.

It’s also worth looking at the condition of the gear already in use. A helmet with a damaged lens, gloves with holes, or worn-out protective clothing should be replaced rather than kept around simply because it technically still exists.

Arc Solutions carries welding helmets, welding gloves, FR welding apparel, and other welding safety gear for a range of shop applications. If you’re putting together a PPE checklist for your crew or replacing worn equipment, our team can help you sort through the options based on the processes you’re actually running.

The goal isn’t to buy the most expensive gear on the shelf. It’s to make sure the person doing the work has the right protection for the job in front of them, and that the gear is comfortable enough and practical enough that they’ll actually wear it.


Back to blog
Blog

08.31.2026
Written by arcmaster

The Most Overlooked Welding Accessories That Improve Productivity

When welders look for ways to improve productivity, the first things that usually come to mind are the welding machine, amperage, or duty cycle. But in our experience at Arc Solutions, the equipment around the machine can have just as much impact on how efficiently a shop operates. The right welding accessories can make setup easier, improve consistency, reduce operator fatigue, and help prevent unnecessary equipment issues.

From MIG guns and ground clamps to fixturing, anti-spatter products, and replacement consumables, these are some of the welding tools that can make a noticeable difference on the shop floor.

Start With Better Fixturing and Setup Tools

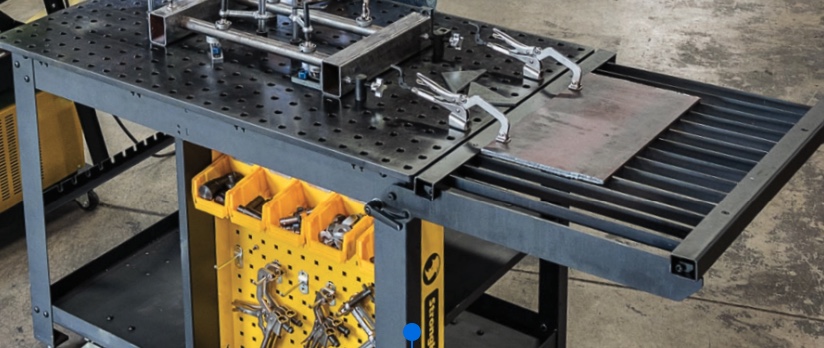
Getting the material positioned correctly before you start welding can save a surprising amount of time. Strong Hand Tools, welding tables and table accessories are good examples of equipment that can make setup easier while improving the overall quality of the finished weld.

Weld dogs are especially helpful when working with steel plates and pipes. They make it easier to align and level pieces so you can get a tight, accurate fit before tacking. That means less time fighting material that has shifted out of position and less rework later.

Magnetic welding squares and welding magnets are useful for the same reason. They help hold joints where you need them while setting angles or tacking inside and outside corners. For jobs that require frequent setup and repositioning, having the right fixturing tools close by can make the process much smoother.

Choose a MIG Gun That Fits the Job

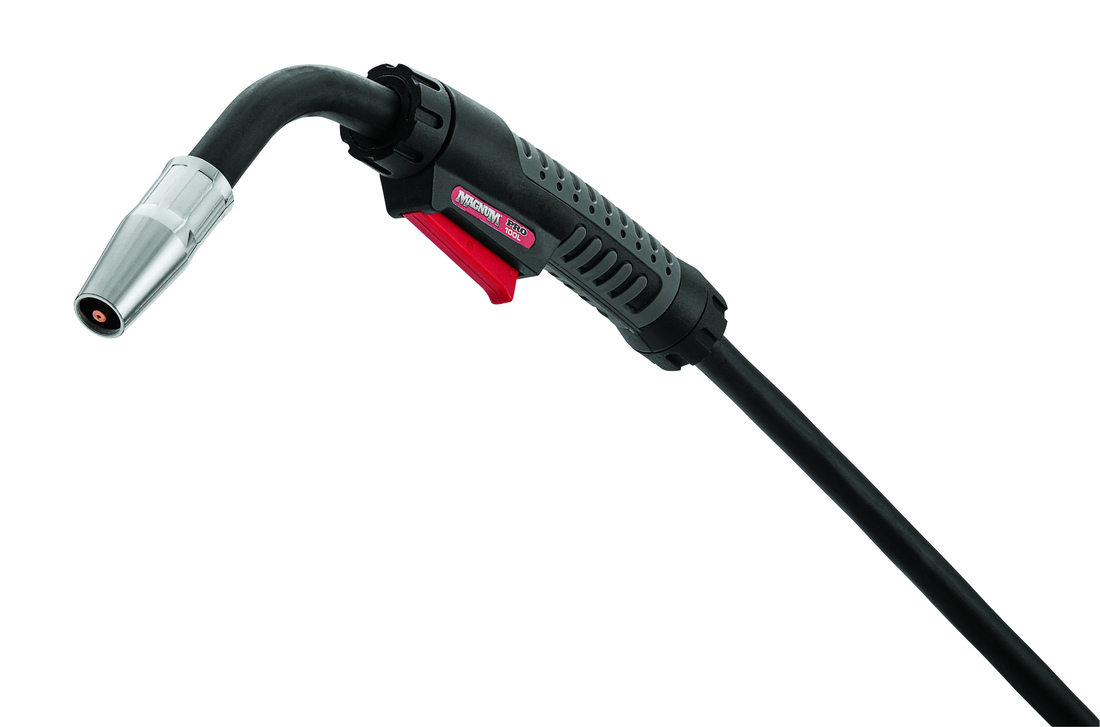
A MIG gun gets a lot of use in most welding shops, but it is easy to overlook when equipment needs to be replaced or upgraded. The right MIG welding gun should be chosen based on how and where it will be used.

Start with the basics: make sure the gun’s amperage and duty cycle are appropriate for the welding machine and the application. From there, consider whether an air-cooled or water-cooled gun makes more sense, how much cable length the operator actually needs, and how comfortable the gun is to use throughout a shift.

Operator comfort is worth paying attention to. A gun that feels awkward or is heavier than necessary can become tiring over several hours of welding.

A worn MIG gun can also create problems that aren’t always immediately obvious. Poor wire feeding, inconsistent weld quality, and increased consumable use can all point to a gun or one of its components that needs attention. Catching those issues early can save time and keep a small problem from turning into a frustrating interruption in production.

Don’t Underestimate the Ground Clamp

The ground clamp may be a small part of the setup, but it can have a big effect on how a weld runs. A weak connection can lead to excess spatter, lack of fusion, and porosity. Poor conductivity can also cause an unstable arc, voltage drop, and overheating.

If the arc doesn’t seem to be running consistently, the ground connection is one of the first things I would check. Make sure the clamp is in good condition and is making solid contact with clean metal. A good connection helps the welder maintain a steady arc and can prevent problems that might otherwise be blamed on the machine or settings.

Inspect Cables and Connectors Every Day

Welding cables don’t have an easy life. They get dragged across the floor, moved around workpieces, and exposed to heat and sparks throughout the day. Over time, that can lead to cuts, scrapes, and burns in the outer jacket.

Once the insulation is damaged and the copper wires are exposed, the cable becomes a safety concern and may not perform properly. That’s why we recommend making cable and connector inspection part of the daily routine. If you find visible damage, don’t ignore it and hope it holds up for another job. Addressing it early is much better than dealing with a safety issue or equipment failure later.

Keep the Right MIG Consumables on Hand

A missing contact tip or damaged nozzle is a small problem until it stops a job. Keeping common MIG consumables at the workstation makes it much easier to get back to work without waiting for a replacement.

We recommend having contact tips, gas nozzles, gas diffusers, spare gun liners, and extra welding wire available.

It’s also important to know what wear looks like. A contact tip should be replaced when the opening starts to look oval or the wire moves from side to side while welding. On a nozzle, look for heavy spatter buildup or physical damage. A liner that is causing wire-feeding problems or bird-nesting is another sign that it’s time for a replacement. For gas diffusers, check for blocked gas holes, damage, or loose threads.

One of the easiest ways to get more life out of consumables is also one of the simplest: clean them regularly. Waiting until a part is heavily worn or clogged usually creates more problems than it solves. Over-tightening components can cause unnecessary damage as well, so parts should be secured properly without forcing them.

Use Anti-Spatter Before Cleanup Becomes a Problem

Anti-spatter spray is one of those products that’s easy to overlook until you’re stuck cleaning spatter off a workpiece. Applying it before welding helps keep spatter from sticking to the metal, which can make cleanup much faster afterward.

We also recommend keeping nozzle dip or spray and a pair of MIG pliers, or welpers, at the welding station. Having them nearby makes it easier to clean the nozzle as needed instead of letting spatter build up and interfere with the gun.

Helmet cheater lenses are another accessory that doesn’t always get enough attention. For welders who need a little magnification to see the joint and puddle clearly, the right lens can make detailed work much easier. Better visibility can mean better control, particularly on smaller or more precise welds.

Build the Station Around the Work

Every welding station is a little different, so the right combination of accessories depends on what you’re building, the materials you’re working with, and the type of welding being done.

A good starting point is a welding table and fixturing that fits the application, the tooling needed for the job, and the appropriate PPE. Then look at where time is being lost. If the same setup, cleanup, or changeover tasks keep interrupting the work, those are good places to look for better tools.

For shops focused on reducing downtime, we often recommend looking at quick-change consumables, anti-spatter products, multifunction welding tools, and Strong Hand tables and fixturing. The goal isn’t to add more equipment just for the sake of it. It’s to have the right equipment available when it’s needed.

Make Maintenance Part of the Routine

Keeping welding equipment in good shape doesn’t require an elaborate maintenance program. Cleaning parts, storing accessories properly, and taking a few minutes each day to inspect the equipment can go a long way.

A quick check can catch a damaged cable, worn contact tip, clogged gas diffuser, or MIG gun issue before it affects the job. Those small checks are much easier to deal with than an unexpected problem in the middle of production.

For us at Arc Solutions, improving welding productivity isn’t always about buying a bigger or more powerful machine. Sometimes it’s about fixing the small things that slow a welder down.

The right welding accessories can make setup easier, keep equipment running properly, and reduce time spent on cleanup and troubleshooting. A dependable MIG welding gun, solid ground clamp, properly maintained cables, quality fixturing, magnetic welding squares, anti-spatter products, and fresh consumables all have a role to play.

When choosing welding tools, we recommend starting with the problems you’re actually seeing in the shop. If a particular accessory saves setup time, prevents a recurring issue, or makes the welder’s job easier, it’s probably earning its place at the station.


Back to blog

Blog

07.30.2026
Written by arcmaster

Welding Rods Explained: How to Choose the Right Electrode for Every Job

When it comes to stick welding, choosing the right welding rod is just as important as having the right machine. Even experienced welders know that using the wrong stick welding electrode can lead to poor penetration, weak welds, excessive spatter, or unnecessary rework. On the other hand, matching the right rod to the material, joint, and welding position makes the job smoother and produces a stronger finished weld.

At Arc Solutions, we talk with welders every day, from first-time hobbyists to seasoned fabricators, and one thing is consistent: success starts with selecting the right welding consumables before striking an arc.

In this guide, we’ll break down the most common welding rods, explain what their classifications mean, discuss real-world applications, and help you avoid the mistakes we see most often. 

Start with the Job, Not the Rod

A question we hear all the time is, “What’s the best welding rod?” The honest answer is: it depends.

There isn’t one rod that’s right for every project. The best choice comes down to what you’re welding and the conditions you’ll be working in.

Before you pick up a box of electrodes, think about a few basics:

  • What type of metal am I welding, mild steel, stainless steel, cast iron, or something else?
  • How thick is the material?
  • Will I be welding flat, vertical, overhead, or in another position?
  • How much penetration does the weld need?
  • Is my machine AC, DC, or capable of both?

In our experience, getting those answers first makes choosing the right welding stick much easier. When the rod matches the material, the weld position, and the capabilities of your machine, you’re setting yourself up for a cleaner weld with fewer headaches.

Understanding Common Stick Welding Electrodes

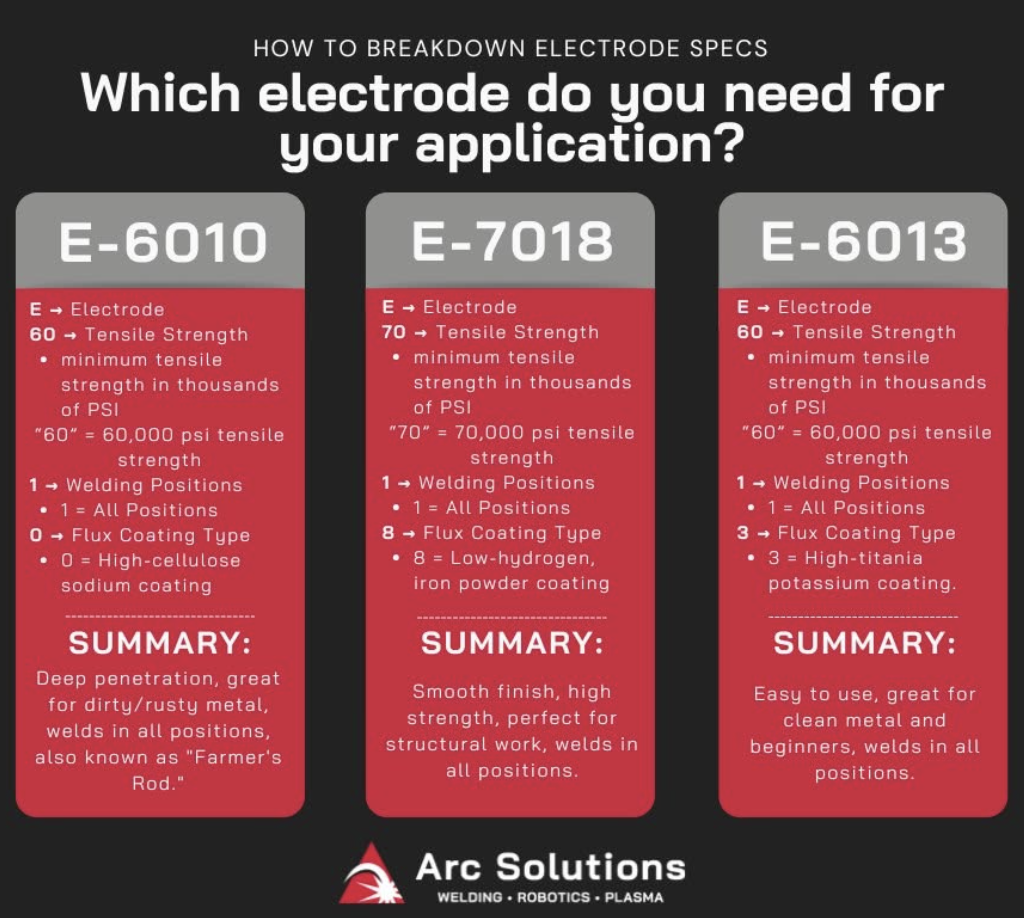
If you’ve ever looked at a box labeled 6010 or 7018 and wondered what all those numbers actually mean, you’re not alone. Every electrode is designed for a specific purpose, and knowing the basics can save you a lot of frustration.

Electrode Common UsesWhy Welders Choose It
6010Pipe welding, root passesExcellent penetration, DC only
6011Repairs on rusty or dirty steelPenetrates through mill scale and runs on AC or DC
6013Light fabrication, thin material, general repairsEasy to run with a smooth, clean-looking bead
7018Structural steel and heavy fabricationHigh-strength, low-hydrogen welds with excellent mechanical properties 

The differences go beyond the number stamped on the rod. Every electrode has its own alloy composition, tensile strength, operating characteristics, and recommended procedures. Some are built for deep penetration, while others prioritize appearance, strength, or ease of use.

We see certain rods come up again and again depending on the job:

  • 6010 remains a go-to for pipe welders because it digs deep and performs well on root passes.
  • 6011 is a favorite for farm repairs and maintenance work since it can handle dirtier steel without extensive prep.
  • 6013 is often where new welders start because it’s forgiving and produces a nice-looking bead.
  • 7018 is the standard for many structural applications where weld strength and reliability matter most.

The key is matching the electrode to the work you’re doing instead of trying to make one rod handle every situation.

What Makes a Welding Rod “Good”?

Ask ten experienced welders what they look for in a welding rod, and you’ll probably hear the same answer: consistency.

A quality electrode should strike easily, maintain a stable arc, and produce predictable results from the first rod to the last. It should also come with clear manufacturer specifications, so you know exactly how it’s intended to perform.

That’s one reason we typically recommend sticking with trusted manufacturers instead of simply buying the cheapest option on the shelf. Quality welding consumables tend to produce better welds, reduce rework, and make the overall welding experience much more enjoyable, especially when you’re working on projects where reliability matters.

The Most Common Mistakes We See

After helping thousands of customers choose welding rods, we’ve noticed that most welding problems don’t start when you strike an arc, they start when the wrong rod gets picked in the first place.

Here are a few mistakes we see over and over.

Using the Wrong Rod Angle

Even if you’ve chosen the correct electrode, the weld can still suffer if you’re holding the rod at the wrong angle. Different joints require different travel angles, and changing that angle can affect penetration, bead appearance, and overall weld quality.

Choosing the Wrong Diameter

Another common mistake is grabbing whatever rod diameter happens to be on the shelf.

Rod size should match the thickness of the material you’re welding. Smaller diameter rods are easier to control on thinner steel, while thicker material usually calls for a larger rod that can lay down more filler metal efficiently.

Forgetting About Polarity

Not every electrode is designed to run on the same current.

Some rods are intended for DC+, while others will run on AC, DC, or both. We regularly talk with customers who are having trouble with an electrode, only to discover it’s simply being used with the wrong polarity.

A quick look at your machine’s settings before you start can save a lot of frustration later.

Don’t Forget About Your Welding Machine

Your welding machine plays a much bigger role in electrode selection than many people realize.

Before buying rods, make sure you know:

  • Whether your machine runs AC, DC, or both
  • Its available amperage range
  • Which polarity settings it offers
  • Whether the machine has enough output for the job you’re doing

For example, if an electrode is designed to run on DC and your machine only provides AC, you’re probably not going to get the results you’re expecting.

Choosing the right rod isn’t just about the metal you’re welding, it’s also about making sure your machine can run that electrode the way it was designed.

Choosing the Right Rod Diameter

One of the questions we hear most is:

“What size welding rod do I need?”

There’s no single answer because it depends on the material you’re welding.

As a general rule, thinner materials are easier to weld with smaller diameter rods, while thicker steel usually benefits from larger electrodes that can deliver more filler metal and deeper penetration.

Another question that comes up often is amperage.

For example, a 1/8-inch 7018 electrode is commonly run somewhere between 90 and 160 amps, although you should always follow the manufacturer’s recommendations for the specific rod you’re using.

Don’t Overlook Storage

Good welding rods can become bad welding rods if they aren’t stored properly.

One of the biggest mistakes we see is leaving electrodes exposed to the air. Over time, moisture can work its way into the flux coating, especially on low-hydrogen rods like 7018, and that can lead to weld defects.

We’ve also seen rods tossed into toolboxes or buckets where the flux gets chipped or cracked before they’re ever used.

Keeping your welding consumables clean, dry, and stored in the proper container goes a long way toward producing consistent welds.

A Few Welding Rod Myths Worth Clearing Up

Some misconceptions just refuse to disappear.

“Stick welding is outdated.”

Not at all. Stick welding is still one of the most dependable processes for structural work, field repairs, construction, pipe welding, and countless other applications where reliability matters.

“You can’t weld sheet metal with stick.”

You can, it simply takes the right electrode, proper machine settings, and a little more patience than MIG welding.

“If a rod gets damp, it’s automatically ruined.”

That’s not always true. Depending on the type of electrode and the manufacturer’s recommendations, some rods can be properly dried and returned to service. The important thing is following the manufacturer’s guidelines instead of assuming every rod should either be reused or thrown away.

Different Jobs Call for Different Electrodes

One reason there isn’t a “one-size-fits-all” welding rod is because every application asks something different from the weld.

For example:

  • Pipe welding often relies on 6010 because of its deep penetration and excellent root pass performance.
  • Structural steel fabrication commonly uses 7018 for its strength and low-hydrogen characteristics.
  • Stainless steel fabrication requires stainless-specific electrodes designed for corrosion resistance.
  • Hard-surfacing and wear applications use specialty consumables built to withstand abrasion and heavy use.

Trying to use one electrode for every project usually creates more problems than it solves.

Buying Welding Rods for the First Time?

If you’re just getting into stick welding, don’t feel like you need to buy every type of rod available.

For most people, starting with mild steel and a quality 6000- or 7000-series electrode is the best place to learn. As your skills grow and your projects become more specialized, you can branch out into rods designed for stainless steel, cast iron, hard surfacing, and other applications.

Just as important as what you buy is where you buy it. Working with an experienced distributor means you can ask questions before spending money on the wrong consumables. A five-minute conversation can save hours of frustration once you’re in the shop.

Find the Right Rod for Your Next Project

Choosing the right welding rods doesn’t have to be complicated. Once you understand how your material, welding position, machine capabilities, and electrode selection all work together, picking the right rod becomes much more straightforward.

Whether you’re repairing farm equipment, welding pipe, or fabricating structural steel, the right welding consumables make the job easier and help produce better results from the first pass to the last.

Shop Welding Rods & Consumables

Looking for the right electrode for your next project?

Browse our Welding Consumables Collection to compare trusted brands for every application. If you’re focused on stick welding, check out our Stick Welding Products collection to find the right rod for your material and machine. And if you’re still deciding which welding process makes the most sense for your work, be sure to read our related guide, MIG vs. TIG – What We Actually Recommend.


Back to blog

Blog

05.19.2026
Written by arcmaster

MIG Welding Machines: What We Actually Recommend for Shops

Buying a new Mig welder seems easy at first, until you start looking at all the options out there.

One machine advertises more power. Another promises to handle multiple processes. Some are priced low enough to feel like a great deal, while others seem way more machine than you think you need. A lot of shops end up focusing mostly on price, and honestly, that’s usually where people get burned.

At Arc Solutions, one of the most common things the team sees is shops buying a MIG welding machine that doesn’t actually fit the kind of work they’re doing.

It may save money upfront, but if the machine struggles with thicker material, can’t keep up with production demands, or is constantly being pushed past its limits, shops usually end up replacing it sooner than they expected anyway.

Most of the time, picking the right welder isn’t about buying the biggest machine on the floor. It’s about finding the machine that actually matches your workload.

The Right MIG Welder Depends on the Work You’re Doing

When Arc Solutions helps someone choose a MIG welding machine, the conversation usually starts with a few basic questions:

  • What thickness are you welding most often?
  • What kind of power is available in the shop?
  • Is this occasional welding or daily production work?
  • How experienced are the operators?
  • How much space do you realistically have?

Those answers usually matter way more than whatever number is printed on the side of the machine.

For garage shops or hobby welders, ease of use and flexibility are usually the biggest priorities. Nobody wants a machine that feels overly complicated for lighter projects.

But fabrication shops and production environments are different. Those shops need machines that can keep up with heavier materials, longer weld times, and daily use without slowing everything down.

What Arc Solutions Actually Recommends Most Often

Not every shop needs the same welder, and that’s why we  usually recommend machines based on how the equipment is actually being used.

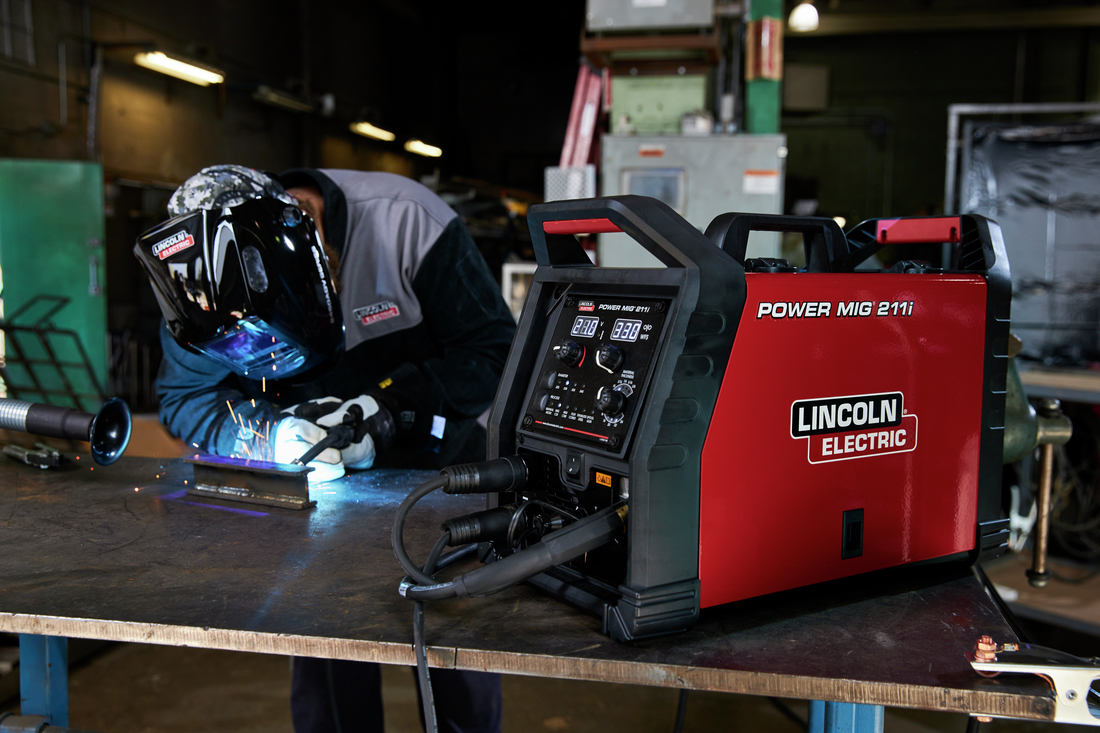
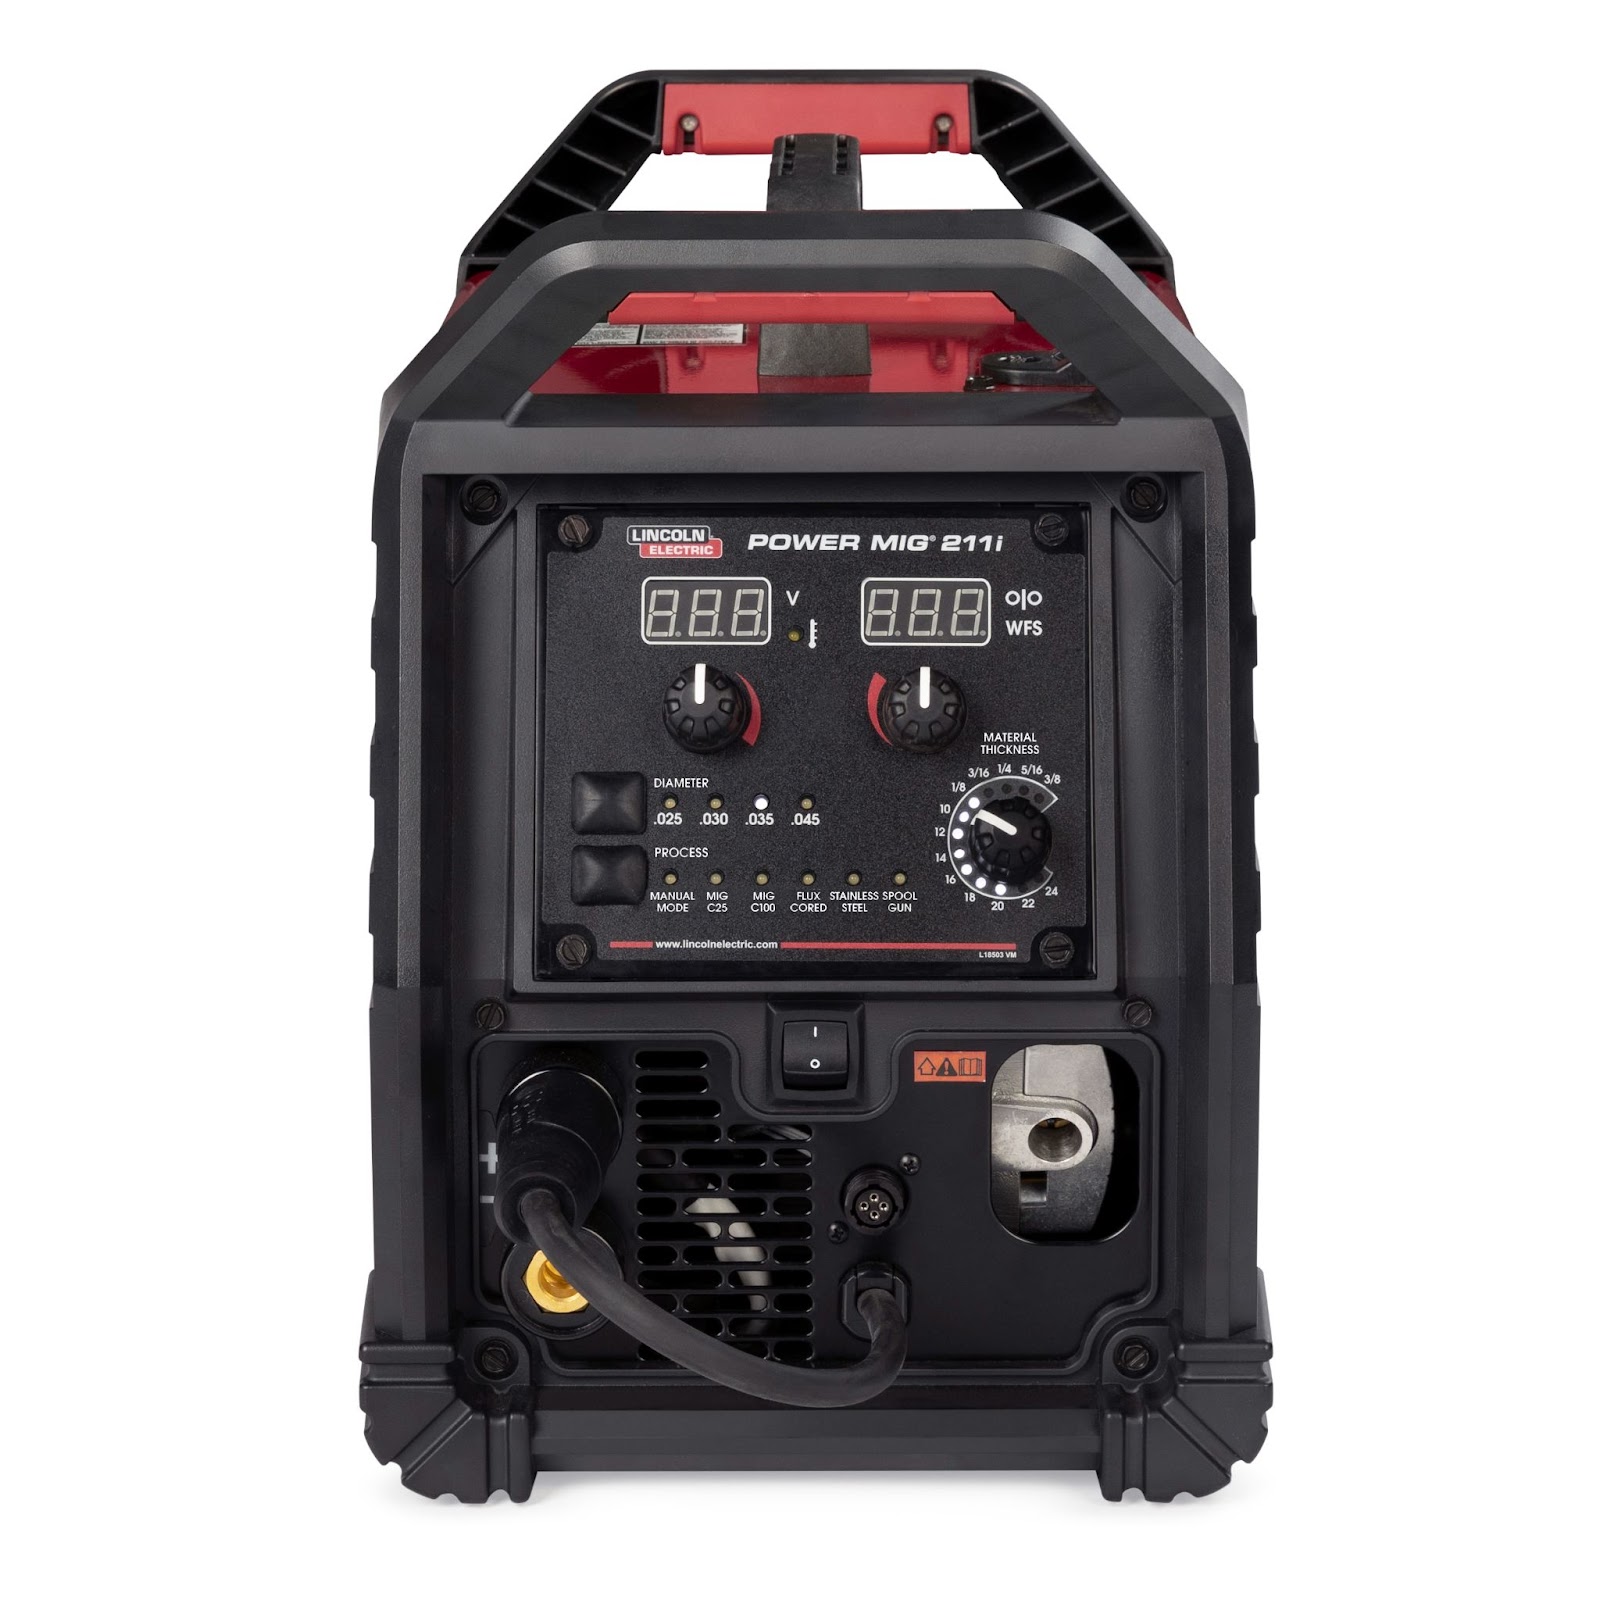
For beginners and hobby welders, the Lincoln Power MIG 211i is one of the most common recommendations. It’s easy to work with, versatile, and handles lighter fabrication work really well without feeling overwhelming.

For automotive applications, the Power MIG 211i and 215MP are both solid options because they offer flexibility while still being dependable for day-to-day shop work.

Small fabrication shops looking for something more versatile often get pointed toward the Lincoln ACDC 220 because it gives shops room to grow without immediately jumping into larger industrial machines.

Once shops start moving into heavier production environments, the recommendations usually shift toward machines like the Flextec or Power Wave series. Those machines are built to handle longer production cycles and heavier workloads more comfortably.

For aluminum welding, Arc Solutions commonly recommends the Power MIG 262P or the Square Wave 205 depending on the process and application.

One of the Biggest Mistakes Shops Make? Buying Too Small

One of the most common regrets shops have after buying a MIG welder is realizing later they didn’t buy a machine powerful enough for their workload.

A lot of people try to save money upfront by going smaller, only to run into problems once production increases or material thickness changes.

Usually the warning signs show up pretty quickly:

  • Cold welds
  • Struggling with thicker material
  • Machines overheating
  • Constantly maxing out duty cycles

For most shops, 200-amp machines handle material up to around ¼” just fine. Once you’re regularly welding anything thicker than that, it’s usually time to start looking at larger-capacity equipment.

That’s also why some smaller welders get outgrown fast.

Machines like the Power MIG 140MP work fine for lighter applications, but fabrication shops usually hit limitations pretty quickly because the machine just isn’t designed for heavier shop production.

Why Duty Cycle Actually Matters

If you’re welding occasionally at home, duty cycle probably isn’t something you think about much.

But if welding is part of how your shop makes money, duty cycle matters a lot.

There’s a huge difference between a machine being used once in a while and one being pushed throughout an entire workday.

Production shops need equipment built with stronger components, better cooling systems, and the durability to hold up under constant use. That’s one reason machines from Lincoln Electric, ESAB, Miller, and Hypertherm tend to hold up so well long term.

There’s definitely some truth to the saying “you get what you pay for” in welding equipment.

Cheaper off-brand machines may look appealing initially, but they often create headaches later with limited service support, hard-to-find replacement parts, and reliability issues.

Multi-Process Machines Aren’t Always Perfect at Everything

One thing we hear a lot is people assuming a multi-process machine will do every process equally well.

That’s not always the case.

Multi-process welders absolutely have their place, especially for shops wanting flexibility, but dedicated machines still tend to offer finer controls and better overall performance for specific applications.

For some shops, convenience matters most. For others, especially fabrication or production environments, dedicated equipment usually performs better long term.

It really comes down to how the machine will actually be used every day.


Accessories Shops Forget About All the Time

Another thing shops overlook constantly? The accessories.

A lot of buyers budget for the MIG welder itself but forget about the equipment that actually helps make daily welding easier and safer.

Some of the most commonly overlooked items include:

  • Welding helmets
  • Gloves
  • Additional wire options
  • Weld pliers (welpers)
  • Wire brushes

They may seem small compared to the welder itself, but they make a huge difference once work starts.

What Shops Should Expect to Spend

One of the biggest questions shops ask is what a realistic budget actually looks like.

In general, Arc Solutions usually recommends:

  • Entry-level users: around $900–$2,300
  • Growing fabrication shops: around $2,300–$6,000
  • Production environments: roughly $4,000–$20,000+

At the end of the day, buying the right MIG welding machine is less about buying for today and more about buying for where your shop is headed next.

That’s really the approach we take with customers, helping shops find equipment that fits their workload now while still giving them room to grow later without immediately running into limitations.


Back to blog

Blog

12.17.2025
Written by arcmaster

Welding Tables: How to Choose the Right Setup

At Arc Solutions, we understand that choosing the right welding table is key to a productive and efficient workspace. Whether you’re a home welder, fabrication shop owner, or industrial professional, selecting the right table ensures precision, durability, and ergonomic comfort.

Fixed vs. Portable Welding Tables

One of the first decisions when selecting a welding table is whether to go for a fixed or a portable setup. Fixed welding tables are ideal for larger workshops and industrial settings. They provide a stable, durable surface that can handle heavy loads and frequent use. These tables often come in steel construction and feature pre-drilled holes for clamping and fixturing, making them perfect for repeatable fabrication tasks.

On the other hand, a portable welding table is excellent for home welders or smaller workshops where space is limited. These tables are designed for mobility without sacrificing stability. Many portable models feature folding legs, adjustable height, and modular surfaces, so you can customize them for a variety of projects. 

Material Considerations: Why Steel Welding Tables Matter

The material of your welding table plays a critical role in durability, accuracy, and long-term performance. Steel welding tables are the industry standard, and the only option we offer, because they provide the strength and precision required for professional welding environments. Steel delivers an exceptionally stable surface, withstands high heat without degradation, and resists warping over time, even under heavy use.

Our steel welding tables, including portable options, are engineered to support demanding workflows while maintaining accuracy. Many feature precision grid or T-slot layouts that allow for repeatable clamping, fixturing, and alignment, helping welders work faster and more consistently. Even when used for aluminum welding applications, a steel table provides the rigidity and reliability needed to achieve clean, precise results.

Size Matters: Choosing the Right Dimensions

Choosing the correct size of your welding table is just as important as the material. Consider both the height and surface area to ensure comfort and efficiency during long welding sessions. A welding workbench that is too small can restrict movement and limit project complexity, while an overly large table may take up unnecessary space and can be harder to manage.

For home welders, a compact table around 36″ x 24″ may suffice, while fabrication shops often require tables exceeding 60″ in length for large assemblies. Adjustable welding tables provide the flexibility to fine-tune the height for different projects, reducing strain and improving precision.

Customization Options: Clamps, Fixtures, and Grid Layouts

Modern welding tables are designed with customization in mind. Look for tables that offer clamps, fixtures, and grid layouts. These features allow you to secure your workpieces in precise positions, ensuring accurate welds and consistent results.

Grid layouts, especially those with T-slots, enable you to attach clamps and accessories in various configurations. This is invaluable for both repetitive tasks and unique projects. For more on optimizing your welding setup, explore our welding accessories page.

Maintaining a Flat, Durable Surface

A flat surface is crucial for accurate welding. Over time, tables can warp or become scratched, which impacts the quality of your work. To maintain a durable surface:

  • Regularly inspect and clean your table to remove slag, debris, and rust.
  • Protect your table’s surface by using sacrificial plates or other coverings when doing heavy work.
  • Keep your table level—use a level to check it regularly, especially for precision tasks.

Maintaining a well-kept surface extends the life of your table and improves the quality of every project.

Setup Examples

  • Example 1: Home Workshop Setup A compact, portable welding table with adjustable height, a small T-slot grid, and clamps for securing small projects. This setup is perfect for hobbyists working on metal art or home repair tasks.
  • Example 2: Fabrication Shop Setup A large steel welding table with integrated T-slots, a wide surface area, and a selection of fixturing clamps. Ideal for repetitive, precision welding tasks such as structural steel assemblies.
  • Example 3: Industrial Welding Setup A fixed steel welding workbench with a modular grid system, overhead lighting, and adjustable fixtures. Designed for high-volume production and heavy-duty applications.

Quick Tips for Choosing the Right Welding Table

  1. Assess your workspace – Measure the area available and ensure your table fits comfortably.
  2. Determine the type of projects – Large assemblies may require a fixed steel table, while smaller projects can be managed on a portable welding table.
  3. Consider adjustability – Adjustable welding tables allow for ergonomic working conditions and can accommodate a variety of tasks.
  4. Think about customization – Look for tables with T-slots or modular grid systems for flexibility.
  5. Maintenance matters – consistent cleaning and inspections ensure your table stays dependable and ready for years of use.

Why Investing in the Right Welding Table Matters

The right welding table impacts not only your comfort and safety but also the quality of your work. A well-designed steel welding table offers precision, durability, and adaptability for a variety of projects. Whether you opt for a portable welding table for flexibility or a fixed welding workbench for heavy-duty tasks, investing in a quality setup can boost your productivity and skill development.

At Arc Solutions, we provide welding tables and accessories designed to help you build the perfect workspace. Set up your workspace for success, find durable, ergonomic welding tables designed for both precision and power. Explore our full range of welding tables and accessories today.


Back to blog

Blog

07.18.2025
Written by arcmaster

Welding in the Heat: Summer Maintenance Tips for Your Machines

When summer temperatures rise, so does the strain on your equipment. For field welders, contractors, and shop foremen, the heat is not just uncomfortable. It is a serious threat to welding machines. From overheating risks to the accumulation of dust and moisture, summer conditions can shorten the life of your equipment and slow down your projects.

At Arc Solutions, we know that a few preventative steps can make all the difference. Let’s explore how you can protect your welding equipment this summer and keep downtime to a minimum.

Why Summer Conditions Are Hard on Welding Equipment

Welding in high heat brings unique challenges that go beyond basic discomfort. The extreme environment causes your machines to work harder, and failure to adapt your maintenance routine can lead to expensive breakdowns.

Common Summer-Related Welding Issues:

  • Overheating: Machines generate a lot of heat on their own. When combined with 90+ degree weather, issues can quickly arise.
  • Dust and debris: Increased use of fans and open workspaces leads to more airborne particles clogging filters and internal components.
  • Humidity and condensation: Moisture can damage circuit boards, lead to corrosion, or cause erratic machine behavior.
  • Extended usage: Summer months are often peak project season, which means less rest time for machines and more wear and tear.
  • UV exposure: Prolonged exposure to direct sunlight can degrade plastic housings, wiring insulation, and protective casings.

How Summer Affects Welding Quality

Beyond equipment failure, heat can also affect weld quality. Materials may expand in hot conditions, leading to inaccurate welds. Higher ambient temperatures can change gas flow dynamics, which impacts shielding and penetration. If your machine is overheating, it may reduce arc stability or lead to inconsistent wire feeding. All of these factors can compromise the structural integrity of your welds.

Additionally, elevated humidity can affect consumables like wire and rods, making them less reliable. Flux can absorb moisture from the air, increasing the likelihood of porosity in your welds. Without tight control over your work environment, even skilled welders may see lower quality outcomes during the summer months.

Summer Welding Tips to Prevent Downtime

Proactive maintenance is always more affordable than emergency repairs. These summer-specific tips will help keep your machines in working condition and protect your investment. You can also learn detailed Lincoln Electric maintenance practices in our comprehensive Lincoln Electric welder maintenance article.

1. Schedule a Mid-Year Service Check

Before you dive into back-to-back summer projects, it is wise to book a professional maintenance check. Arc Solutions offers seasonal service appointments that evaluate machine performance, replace worn parts, and clean critical components. Book your summer service check now to avoid breakdowns when the heat is on.

2. Clean and Replace Filters Often (Engine-Drive Welders)

Airborne particles increase during the summer due to dry conditions, outdoor workspaces, and increased ventilation. Filters should be checked biweekly or after every major job, depending on your environment. See our welding repair parts. Recommended maintenance includes:

  • Inspect filters
  • Clean or replace engine filters as needed
  • Check for signs of blockage or restricted airflow

Arc Solutions offers a variety of machine accessories and protective covers designed to help protect your equipment from tough environmental conditions. Check with your Arc Solutions representative for the latest options.

3. Keep Machines Out of Direct Sunlight

Heat buildup accelerates internal component failure. When storing your welder, keep it under shade, a tarp, or a fire-resistant cover. Here are some of the best practices:

  • Store equipment in climate-controlled or shaded areas
  • Avoid leaving machines in vehicles or open trailers in direct sunlight if possible

4. Adjust Work Timing When Possible

If your schedule allows, shift some of your heaviest welding tasks to earlier in the morning or later in the evening when outdoor temperatures are lower. This will reduce stress on the machine and prevent overheating.

Bonus Tip: If working indoors, ensure ventilation systems are optimized to push hot air out and draw cooler air in.

5. Monitor Duty Cycles Closely

Summer jobs often stretch beyond the standard duty cycle of your machine. If a welder is rated for a 60 percent duty cycle at 300 amps, exceeding that under high temperatures can cause serious damage. Here is what you can do to mitigate negative results:

  • Know your machine’s duty cycle and operate within limits
  • Let machines rest during peak heat hours
  • Use external fans to assist in cooling

6. Store Consumables Properly

Hot, humid conditions can ruin consumables quickly. Always store rods, wire, and flux in dry, temperature-controlled containers. Consider using dehumidifiers or silica gel packs in your storage bins.

7. Inspect Leads and Cables More Frequently

Cables exposed to sunlight or lying on hot surfaces can develop cracks in insulation, become brittle, or fail unexpectedly. Inspection tips include:

  • Look for discoloration, warping, or exposed wire
  • Replace damaged leads promptly
  • Use protective sleeves for added insulation

Summer Welding Maintenance Checklist

Use this checklist to keep your maintenance on track all summer long. Post it in your trailer, shop wall, or tool truck for quick access.

Weekly Maintenance Tasks

  • Inspect air intake and exhaust vents for blockage
  • Clean or replace filters
  • Wipe down exterior surfaces
  • Inspect cable connections for heat damage
  • Check cooling fans for debris

Monthly Maintenance Tasks

  • Clean circuit board compartments using compressed air or a vacuum
  • Test for electrical continuity and grounding issues
  • Review duty cycle performance against recent workloads
  • Tighten any loose fasteners or mounting hardware
  • Check for software or firmware updates if applicable

Before Each Job

  • Perform a quick visual inspection of the machine and its leads
  • Confirm fan operation and unrestricted airflow
  • Check shielding gas lines and regulators for any leaks
  • Ensure the machine is set up on a flat, shaded, and stable surface

Protecting Your Power Supply from Summer Stress

Your power supply is the heart of your welding setup, and it is especially vulnerable in extreme heat. Overloading the power supply in hot weather can cause thermal shutoff or permanent damage.

Tips to Protect Power Supply:

  • Ensure cables are in good condition and not overheating
  • Keep units cool with auxiliary fans or increased airflow
  • Avoid exceeding duty cycles during peak heat hours, typically between 12 PM and 3 PM
  • Use voltage surge protectors if thunderstorms are frequent in your region
  • Consider rotating equipment if multiple machines are available. Rotating machines between jobs can keep them from overworking in one location.

Accessorize for the Season: Add-Ons That Prevent Problems

Simple accessories can make a big impact on summer performance. You can explore recommended add-ons on our machine accessories page. Whether you are working in the field or the shop, consider these seasonal add-ons.

Fans and Ventilation Enhancements

  • Portable exhaust fans to increase airflow
  • Clip-on fans for shop setups
  • External fan kits to enhance internal cooling

Protective Covers

  • Fire-resistant welder covers
  • Heavy-duty tarps for on-site equipment
  • Moisture-resistant storage bins for leads and torches

Cable and Hose Management

  • Cable organizers to keep them off hot surfaces
  • Insulated sleeves for high-heat protection
  • Quick disconnects for faster maintenance

Do Not Let Heat Cost You: Schedule Service Now

The best way to beat the heat is to stay ahead of it. Arc Solutions offers comprehensive summer service checks for all major welding machines, including Lincoln Electric, Miller, ESAB, and others. We inspect for early signs of heat damage, replace vulnerable components, and ensure your machine is ready for the season ahead. Do not wait until you are stuck on the job with a damaged machine. Schedule a summer service with Arc Solutions today.

Why Partner with Arc Solutions?

At Arc Solutions, we do more than supply machines. We help you maximize performance and lifespan through fast, reliable welding machine repairs, preventative maintenance plans, access to quality replacement parts and accessories, and on-site or in-shop service options.

Our team works directly with field welders, contractors, and shop managers to keep operations running smoothly. We understand the realities of working in the heat and have the tools and expertise to help you stay productive.

Visit our services page to learn more about how we support working welders across industries.

FAQ: Summer Welding Maintenance

Q1: Why do welding machines overheat more in summer?

High ambient temperatures make it harder for welding machines to dissipate the heat they generate during operation. Combined with dust, humidity, and extended usage, this can cause internal components to run hotter, increasing the risk of overheating and machine failure.

Q2: What are the signs that my welding machine is overheating?

Common signs include the machine shutting off unexpectedly, decreased weld quality or arc instability, unusual smells or noises, and visible heat distortion or discoloration on machine parts and cables.

Q3: How can I extend the life of welding consumables in summer?

Store rods, wires, and flux in dry, temperature-controlled environments. Use sealed containers with moisture-absorbing packets and avoid leaving consumables exposed to heat or humidity.

Q4: When is the best time to schedule a summer service check?

Ideally, schedule your summer service before your peak project season begins, or at least mid-year. This proactive step helps catch issues early and keeps machines running smoothly during the hottest months.


Back to blog

Blog

06.19.2025
Written by Madison Barnhart

Gas Types Used in Welding: Argon, Acetylene, and Nitrogen Explained

When sourcing gases for welding or cutting applications, understanding the role of shielding gases in different types of welding processes is essential. The right gas can significantly impact weld quality, strength, and efficiency. 

This guide outlines the most commonly used welding gases—argon, acetylene, and nitrogen—and compares their uses, benefits, drawbacks, and effects on various welding processes.

Why Shielding Gas Matters in Welding

Every weld must be protected from atmospheric contamination until the metal solidifies. Oxygen and nitrogen in the air can introduce porosity, spatter, and cracking. Shielding gases act as a protective barrier, stabilizing the arc and improving weld integrity. The type of welding gas you choose will determine your results.

Understanding Argon Gas

Argon gas is an inert shielding gas commonly used in both MIG and TIG welding. It provides excellent arc stability and reduces spatter, making it ideal for precise welds and clean finishes.

Applications:

  • MIG welding aluminum (requires 100% argon)
  • TIG welding all materials
  • MIG welding of stainless or mild steel (when blended with CO2 or O2)

Pros:

  • Stable arc and low spatter
  • Inert—no chemical reactions with molten metal
  • Excellent for spray and pulse transfer modes

Cons:

  • More expensive than CO2
  • Limited penetration when used alone on thicker materials

Using Acetylene in Torch Cutting

Acetylene is most commonly used in oxy-fuel torch cutting and gas welding applications. When combined with oxygen, it produces one of the hottest flames available—ideal for cutting ferrous metals.

Applications:

  • Oxy-acetylene cutting
  • Brazing

Pros:

  • High flame temperature
  • Precise control
  • Great for portable setups and fieldwork

Cons:

  • Flammable and unstable if handled improperly
  • Not suitable as a shielding gas for arc welding

The Role of Nitrogen in Welding & Plasma Cutting

While not as commonly used as argon or acetylene, nitrogen is still a valuable welding gas in specific applications. It is often used as a backing gas or purging gas, and in plasma cutting systems.

Applications:

  • Plasma cutting
  • Purging stainless steel welds
  • Shielding in some specialized MIG applications
  • Many laser applications (cutting and welding) 

Pros:

  • Cost-effective
  • Inert in many settings
  • Helps reduce oxidation in purging

Cons:

  • Can cause brittleness if used incorrectly in arc welding
  • Not ideal as a primary shielding gas for most applications

Comparison Chart: Argon vs. Acetylene vs. Nitrogen

FAQs: Welding Gas Questions Answered

Can you mix gases? Yes. Gas blends (e.g., 75% argon/25% CO2) are common and tailored to specific applications. For instance, a 90/10 argon/CO2 mix works well for spray transfer MIG welding.

Which gas is best for aluminum welding? 100% argon gas is recommended for both MIG and TIG welding aluminum.

What type of welding gas should I use for stainless steel? For MIG: Try a 98% argon / 2% CO2 mix. For TIG: Use 100% argon.

Is nitrogen ever used in MIG or TIG welding? Rarely, and only in highly specialized processes. Nitrogen is more commonly used in purging or plasma cutting.

Choosing the Right Welding Gas for Your Application

The right shielding gas depends on the material, process, and desired weld quality. Technical buyers need to assess the gas’s role in heat input, arc characteristics, and post-weld cleanup. Whether you’re selecting gases for structural steel, stainless fabrication, or high-precision aluminum work, the type of welding gas directly affects your results.

Explore welding gas options compatible with our full line of welding products—we’re here to help you find the right solution for every application.


Back to blog

Blog

05.15.2024
Written by arcmaster

How Cobots Are Changing the Game in Manufacturing

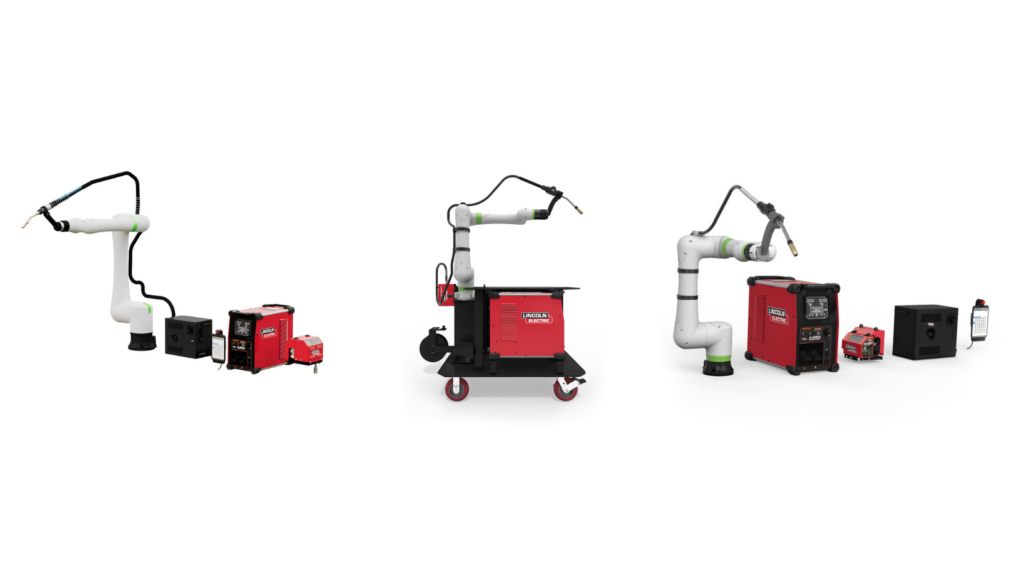
Automation is changing the world all around us. Manufacturing is one of the industries in which automation has had the most impact. There are many different automated routes a manufacturer can go down. One of the newest and fastest-growing automations is collaborative robots, including the Lincoln Electric Cobots. 

Cobots, or collaborative robots, are designed to collaborate with human assistance. The idea of most automation is to increase productivity while maintaining quality. How do manufacturers do these things and what does it consist of? The answer is simple: resources, money, and time! The three components are connected so improving in one area tends to have a domino effect. 

Who Can Benefit From A Cobot?

Before diving too deeply into what a Lincoln Electric Cobot has to offer, let’s talk about who would best benefit from a Cobot. A Cobot is certainly not a one-type-fits-all piece of technology. Since cobots work in collaboration with you, they are designed with safety in mind. Cobots move slower than traditional robots with a max speed of 250 mm/second. When compared to a traditional robot in a time cycle analysis, a Cobot will tend to have increased cycle time. However, the weld time will remain the same since both cobots and robots weld at the same weld travel speed.If you’re not mass manufacturing a single part non-stop but rather have 20-50 parts of multiple different items you interchange, a Lincoln Electric Cobot could be a good fit for you. When operating with a traditional robot, running these mass amounts of one item and then switching to another item significantly affects production rates and downtime. The time to switch out all the necessary components and reprogram the machine becomes expensive fast. The cobot controller has the capability to store hundreds of programs so once that program is written it is easy to call it back into production. You can also “call” multiple programs into a master program enabling you to weld different parts or designs inside the same robot program.

Cooper cobot

Resources

As previously mentioned, cobots were created with human collaboration in mind. To the worker, a Cobot could be considered a coworker. Cobots are often advertised as an ‘anyone can do it’ piece of technology. However, there is a necessary minimum amount of knowledge in the field you work in required to operate the equipment. It is important that your cobot programmer knows how to manually weld and is also comfortable with a smartphone. Another important quality is your controller needs to have a clear vision of the desired results and a general understanding of what it takes to achieve your end product. While not for just anyone off the streets, the teachability of Lincoln Electric Cobots is still one of its largest selling points. If you combine the general understanding I touched on previously with the teachability of the Cobot, your likelihood for success is significantly more feasible. 

If we look at resources from another perspective, a Cobot (like any robot) is designed to increase efficiency. This isn’t only from a time standpoint but also from a production perspective. When a Cobot is taught a task its job is to complete the task as taught. This functionality results in fewer mistakes and more consistent work, which maximizes your use of physical resources For example, a MIG weld wire using pulse waveforms has a 98% process efficacy. This means 98% of the weld wire purchased actually makes it into the weld rather than spatter on the fixtures or shop floor. Taking this a step further, this maximizes your output as well. 

There tends to be a negative connotation associated with robots and Cobot automation in general. However, taking the time to understand the functions and purpose behind the technology can help alleviate these concerns. As mentioned previously a cobot is a collaboration robot. It is not designed to take the place of the worker; it is designed to be a resource for the worker. The best part is that Lincoln Electric Cobots are customizable – we work with you to get the setup you need. 

Time

The next area of productivity is time and this is an obvious point of discussion with any form of automation. One of the greatest leaps the manufacturing world can take when increasing productivity is streamlining operations as much as possible. The idea of having a seamless flow from one operation to the next is the ideal pathway for any manufacturer. For streamlining operations, cobots can be a pivotal resource, as the production rate of a robot is typically triple that of a manual welder. The repetitive and consistent nature of a Cobot makes for a process to be completed from the starting teach point to the finishing teach point the same way, every time. Since the Cobot is busy doing the actual welding, the operator now spends their time loading and unloading parts. Using a Cobot is like picking up an employee who also happens to be the fastest welder in your shop. 

A Cobot allows companies to explore new technology, refine existing processes, and push the boundaries of what is possible in manufacturing. This equipment is not only a resource for improving productivity but also a catalyst for innovation and progress.

Money

It is no secret that when time is saved, money is also saved! As mentioned in one of our previous blogs, “The typical labor and overhead cost is three times the hourly wage of the employee, meaning that a $20/hr employee costs the company $60/hr to have on staff.“ In areas where operations can be streamlined, resources optimized, and downtime minimized, money can be saved. These benefits rank among the first improvements you’ll see that help prove your return on investment. Additionally, its collaborative design eliminates the need for expensive safety measures and dedicated robot zones, further reducing capital expenditures. Another bonus with the Lincoln Electric/Fanuc Cobots is that you’ll always have access to the latest software updates; as these are FREE and available online – keeping your production a step ahead of the game.

Find The Perfect Cobot With Arc Solutions!

Technology never slows down and is in a constantly evolving state. The Cobots designed today will continue to adapt to the needs of the industry and we are ready for it. The dynamic role of collaborative robots in enhancing manufacturing environments cannot be overstated. From improving safety and productivity to fostering innovation and adaptability, cobots are redefining the way we think about manufacturing. As we embrace this collaborative future, one thing is clear: the era of cobots has only just begun, and the possibilities are limitless. If you’re interested in finding out if a cobot is the best fit for you contact us to schedule a demo today!


Back to blog

Blog

03.26.2024
Written by arcmaster

Lincoln Electric POWER MIG® 211i Welder: A Buyer’s Guide

Lincoln Electric manufactures a large variety of welders, making it hard to know which unit is the best fit for your needs. In this blog, we will discuss the Lincoln Electric POWER MIG® 211i (k6080-1) and all its abilities. The POWER MIG® 211i is capable of MIG and flux-cored welding. The machine is compact but can still cater to a wide variety of needs, lending to why it is a valuable asset to have in many different welding environments.

Benefits of the Lincoln 211i

The Lincoln POWER MIG® 211i welder blends innovation with practicality, making it a powerhouse for welders at any skill level. Let’s take a look at what makes this welder so special.

User-Friendly Interface

The 211i is outfitted with a seven-segment display. The interface of the unit includes basic knobs and control buttons. This simple design allows for an uncomplicated, straightforward setup for welding processes. There is no extra work or time required in fine-tuning specific settings, only a streamlined workflow. This allows a beginner welder all the way to a seasoned and professional welder the ability to use the same equipment.

Lincoln 211i display

Portable, Robust, and Versatile

The POWER MIG® 211i is encased in a compact design with dimensions 22” L x 11” W x 16” H and a weight of 41 lbs. The smaller design does not take away from the robustness the unit has to offer. The machine comes with multiple lift handles making moving from project to project that much easier. Further enhancing the portability of the machine, the 211i also offers dual input voltage. The 230V to 120V power cord adapter allows the machine to plug into any common power supply.  This capability also allows for increased versatility with the machine from working at home in your garage to light industrial shop work, the 211i will have you covered. 

The wire feed in the 211i is similar to the POWER MIG® 215 MPi™ and the POWER MIG® 140MP® systems, offering a consistent and smooth feed. The 211i system paired with the included Lincoln Electric Magnum® PRO 100 L Welding gun makes for seamless operation. The Magnum® PRO 100L is a semi-automatic MIG welding gun with 100A, 100% mixed gas duty cycle. This model is the lightest gun in the Magnum® PRO series. Its curved handle with rubber molding makes for easier grip and enhanced comfort. Together the gun and the machine are ideally used in home and small shop projects, as mentioned above, along with farm, auto body work, and light maintenance/repair applications. 

lincoln 211i wire feed

Whether performing maintenance, repair, or light industrial work, this welder excels in delivering superior results across various tasks. With simple and adjustable settings and reliable performance, users can tackle diverse welding projects with ease and efficiency. The Lincoln Electric Power MIG® 211i welder offers a comprehensive solution for welding enthusiasts searching for portability, versatility, and performance.

A Game-Changer in Welding: Lincoln POWER MIG® 211i

Step up your welding game with the Lincoln Electric POWER MIG® 211i! Perfect for everyone from the passionate DIYer to the seasoned small shop owner, this welder is a game-changer. Imagine the projects you’ll tackle with its unparalleled simplicity and performance. Don’t let another day go by without this essential tool in your arsenal. Click here to unlock the full potential of the POWER MIG® 211i.


Back to blog

Blog

02.26.2024
Written by arcmaster

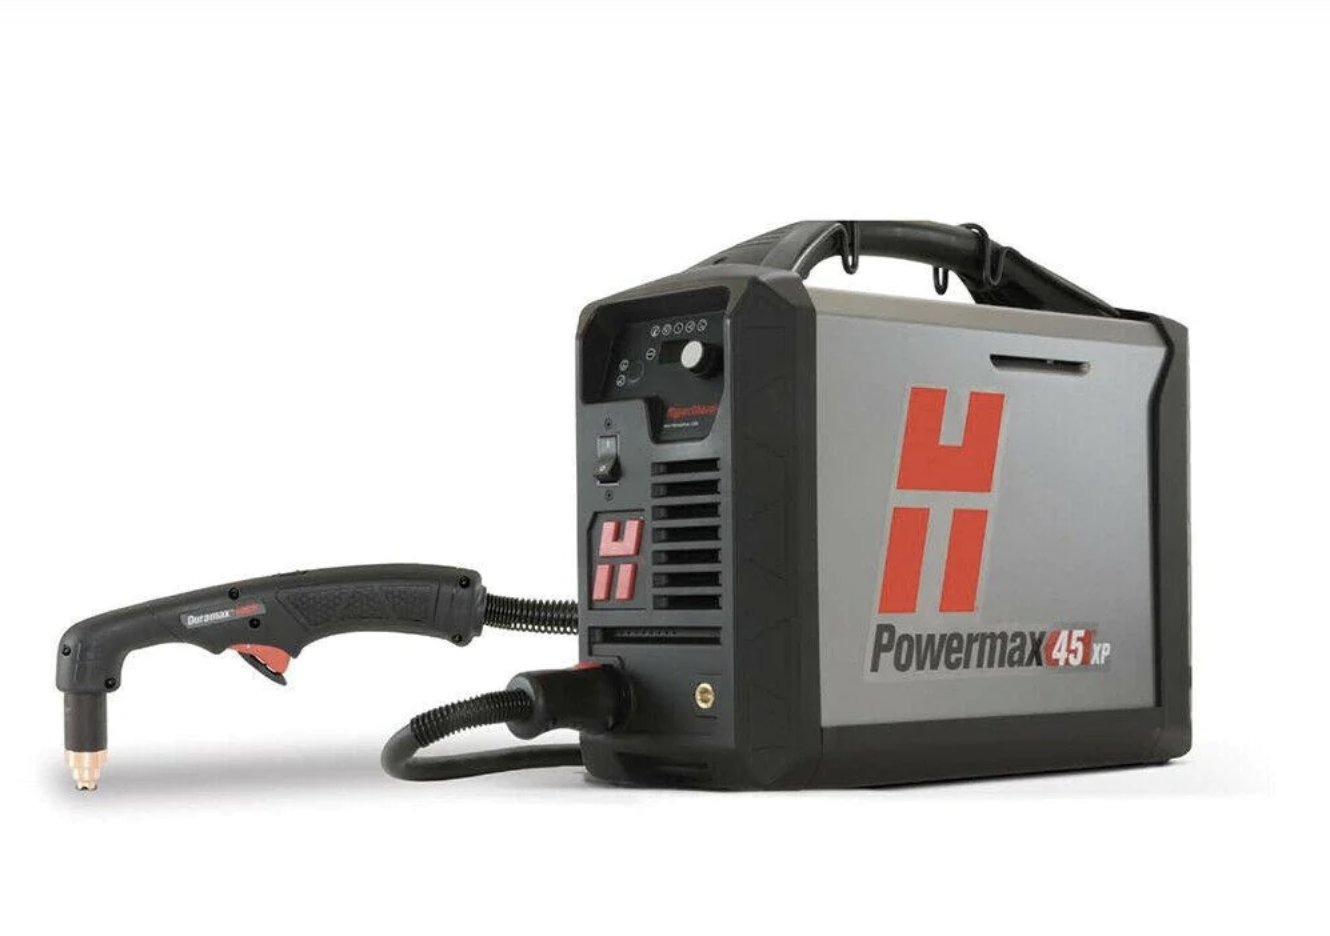
Hypertherm Powermax 30 XP vs 45 XP: Which is Right for Your Workshop?

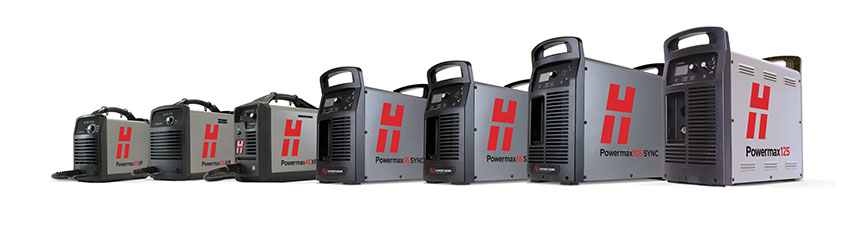
Known for its portability, user-friendly controls, and reliable plasma arc, the Hypertherm Powermax series boasts some of the most reputable plasma cutters on the market. Whether you’re new to cutting or a pro, these tools cover a wide range of applications, making them a great choice for anyone.

Which Plasma Cutter is Best for you?

Two of the most popular models are the Hypertherm Powermax30 XP and the Hypertherm Powermax45 XP. This selection of machines caters to a wide range of metal fabrication needs, from cutting thinner metal projects to gouging tasks. 

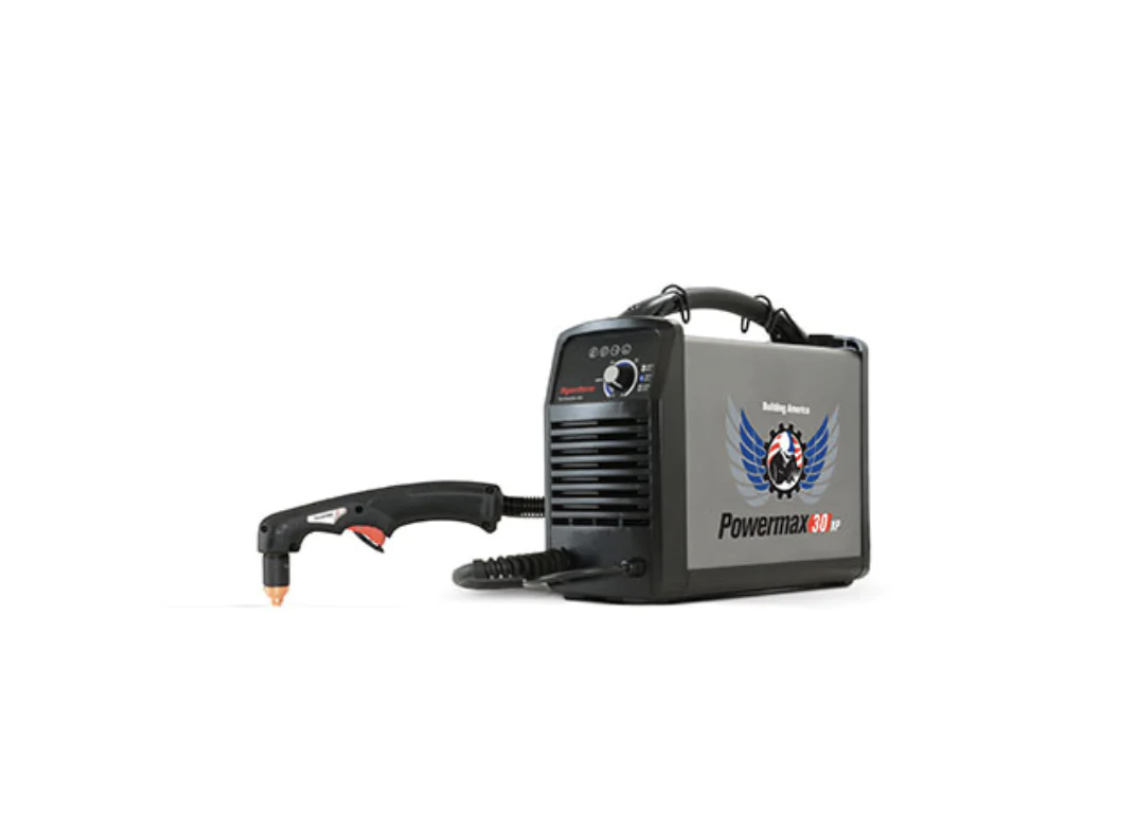
Powermax30 XP

The Powermax30 XP has a host of impressive capabilities for being the less formidable of the two machines. The 30XP has a recommended cut capacity of 3/8in (10mm), a severance cut capacity of 5/8in (16mm), and an output amperage of 15-30 A. This machine supports drag cutting, fine feature cutting, and extended reach cutting or gouging. The 30XP also comes in a carrying case that includes:

  • 240 V/20 A plug with adapters  or 120 V/15 A and 240 V/20 A circuits
  • Hypertherm Powermax 30 XP Power supply, 15 ft. (4.5 m) Duramax LT hand torch with standard consumables, 15 ft. (4.5 m) work clamp
  • Operator and safety manuals
  • Consumable kit with 1 standard nozzle, 1 electrode, 1 Fine Cut nozzle, and 1 Fine Cut deflector
  • Carrying strap
  • Leather gloves
  • Shade 5 glasses

Fully loaded with all these items, the Powermax30 XP is a good choice as an on-the-go plasma cutter.  The machine by itself weighs in at about 21lbs, making it one of the lightest plasma cutters Hypertherm has to offer. Along with its lightweight, the Powermax30 XP also offers dual voltage 120V/240V, thus enhancing its portability to plug in anywhere.

On mild steel cutting 1/8 in thickness, the Powermax30 XP outperforms traditional oxy-fuel cutting speed by over 300%. The enhanced speed of plasma cutting saves the end user both time and money. Not only is this machine fast, but as mentioned above, it allows FineCut® capabilities making it a good choice for fine-detailed and thin-metal projects. The Powermax30 XP stands out as a competitor in the realm of plasma cutters by showcasing its versatility, not only excelling at primary functions but also demonstrating the capability to gouge metal effectively. For a hobbyist or someone who plasma cuts on the go consistently or enjoys being a garage hobbyist, the Powermax30 XP is a great investment.

Powermax45 XP

As the more robust of the two machines, the Powermax45 XP is capable of everything the Powermax30 XP can do and more. This machine supports:

  • Drag cutting
  • Extended reach cutting and gouging
  • Fine feature cutting
  • Flush cutting
  • Max control gouging
  • Marking
  • Mechanized cutting
  • Precision gouging

This comprehensive list of functionalities demands a heightened level of performance from the machine.  The Powermax45 XP has a recommended cut capacity of 5/8in (16mm), a severance cut capacity of 1-1/8in (29mm), and an output amperage of 10-45 A. This machine is also lightweight at 30 lbs and comes with a lift handle on top. However, it does not offer the ability to plug into a 120V household outlet like a Powermax30 XP and is an overall larger machine dimensionally. But don’t let this detract from all the other attractive features the Powermax45 XP hosts. The Powermax45 XP is a high-performing plasma cutter with industrial capabilities and is often used as such. The unit would typically be considered overqualified to be purchased as solely a garage hobby cutter. 

This machine offers compatibility with hand torches, machine torches, robotic torches, and handheld long torches. The Powermax45 XP torches are also equipped with FastConnect™ torch to allow for quick and easy switching between torches. Hypertherm also offers a cartridge adapter that allows the torches that are compatible with the Powermax45 XP to accept the new SYNC cartridges. The SYNC cartridges are an added convenience in plasma cutting because they eliminate the need for multiple consumable pieces. Instead of having an individual swirl ring, electrode, nozzle, shield, and retaining cap, with the cartridge adapter (428951) the SYNC cartridge functions as a 5-in-1. 

Choosing your Hypertherm Plasma Cutter: Expert Guidance

In conclusion, the Hypertherm Powermax series stands as a pinnacle in the realm of plasma cutters, catering to diverse metal fabrication needs. On one hand, The Powermax30 XP, with its lightweight design and versatile capabilities, is an excellent choice for on-the-go plasma cutting tasks, boasting remarkable speed and precision. On the other hand, the Powermax45 XP offers industrial-grade performance, featuring an extensive range of functionalities and compatibility with various torch types, including the innovative SYNC cartridges for added convenience. Whether you’re a hobbyist or an industrial professional, the Powermax series delivers cutting-edge technology and unparalleled performance for all your metalworking needs.
Are you ready to enhance your workshop’s cutting efficiency? Decision-making can be challenging, but with the right information, it becomes simpler. Whether your interest is piqued by the compact precision of the Powermax 30 XP or the powerful versatility of the Powermax 45 XP, the ideal plasma cutter for your needs is within reach. Get in touch with us now for expert guidance tailored to your specific requirements, or explore our detailed product listings to make an informed decision. The perfect Hypertherm model for your workshop is just a step away – let’s make that choice together today!


Back to blog

Blog

01.18.2024
Written by arcmaster

Lincoln POWER MIG 215 MPi vs POWER MIG 140 MP: Find What Suits Your Needs

Hobbyist and professional alike, Lincoln Electric has a welder to suit everyone. Their vast array of welders range from portable shop units that plug into a typical household outlet, all the way to engine drives that pull behind utility vehicles for industrial work. In this article, we are going to dive into two of the many shop units Lincoln Electric has to offer; the Lincoln POWER MIG 215 MPi and the Lincoln POWER MIG 140 MP Multi-Process Welder. 

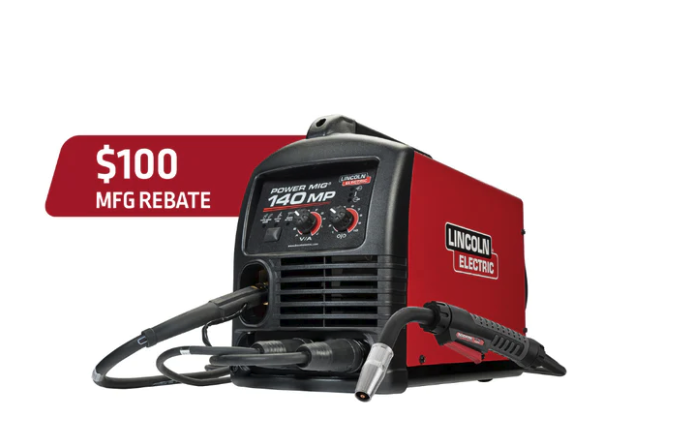
Lincoln POWER MIG 140 MP Multi-Process Welder

lincoln welder 140 for sale

Let’s start with the POWER MIG 140 MP. This unit is a multi-process welder which means that it has MIG, Stick, Flux-Cored, and DC TIG welding capabilities. Users can easily access the TIG capabilities on this machine by purchasing the POWER MIG 140 MP TIG One-Pak®. The package includes a Lincoln Electric TIG torch and foot pedal. This option is convenient as it provides users with a comprehensive welding solution all in one purchase. The versatility of this compact and powerful unit is one of its many attractive features.

 The POWER MIG 140 MP is an excellent choice for small, on-the-go type projects. This unit weighs in at 35 lbs and plugs into a household 120V power source, which makes transport an ease from the garage to the shop. Lincoln Electric describes this machine as, “If you can only have one welder, the POWER MIG 140 MP from Lincoln Electric is the one to have.” Portability and versatility aren’t the only selling points for this unit. Affordability can certainly squeeze its way into why it is a top seller in the Lincoln Electric line-up. The POWER MIG 140 MP comes in at a price point of $969 making it one of Lincoln Electric’s least expensive welders. 

It’s clear the POWER MIG 140 MP delivers on its promise of versatility and accessibility, making it a top-seller in the Lincoln Electric lineup. This machine proves that great quality does not require a hefty price tag.

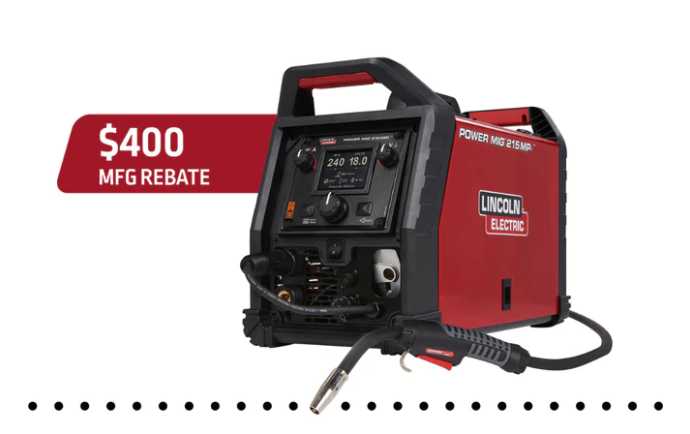
Lincoln Electric POWER MIG 215 MPi™ Multi-Process Welder

lincoln 215 mpi for sale

Now let’s uncover the Lincoln Electric POWER MIG 215 MPi™ Multi-Process Welder. This unit can attack all the same projects the POWER MIG 140 MP can handle and then some. The POWER MIG 215 MPi is capable of MIG, TIG, Stick and Flux-Cored welding when paired with the proper equipment. This machine offers two different One-Pak® options:

The POWER MIG 215 MPi houses a more robust design in size and shape. The unit offers multiple lift points and weighs under 50 lbs. The machine includes an adaptor for 230V to 120V so the user can utilize its dual input voltage with any common power source. These combinations of features gear the Lincoln Electric POWER MIG 215 MPi towards general fabrication jobs, small contractors, and repair personnel. 

With the capability to withstand heavier duty jobs, the price also follows suit. However, this does not make the machine unaffordable by any means. The ArcFX® Technology in this unit provides instant visual feedback on how settings affect the weld outcome, which is certainly a factor in the expense of the machine. Other technological related expense factors consist of the simple Ready.Set.Weld® setup to make it easier to get started and the memory available to easily recall saved settings to get welding faster. When compared to others in the same class of work as the POWER MIG 215 MPi that also share similar capabilities and technology, this machine comes in at one of the lowest price points of $1,999. This price also includes Lincoln Electric’s 3 year warranty in the event of system failure. 

The POWER MIG 215 MPi stands out as a reliable and cost-effective solution for welding enthusiasts and professionals. The unit’s next-level and user-friendly technology makes this a great choice for any welder at work. The machine’s versatility is its ability to take on MIG, TIG, Stick and Flux-Cored projects, making it one that is hard to beat. The POWER MIG 215 MPi is a higher price point than the POWER MIG 140 MP, but is undoubtedly a competitive choice for the features it offers.

Lincoln Electric Solutions: Power MIG 215 MPi & Power MIG 140 MP

Both the Lincoln POWER MIG 140 MP and POWER MIG 215 MPi showcase the quality and innovation of Lincoln Electric. The POWER MIG 140 MP caters to hobbyists, offering versatility at an affordable price point. On the other hand, the POWER MIG 215 MPi steps up the game with enhanced capabilities suitable for heavier-duty tasks, coupled with advanced technology features. While the POWER MIG 140 MP excels in entry-level applications, the POWER MIG 215 MPi targets a more demanding audience, balancing performance and affordability. Ultimately, the choice between these models depends on the user’s specific needs, skill level, and the nature of their welding projects. 
Lincoln Electric provides options that cater to a spectrum of users, ensuring quality welding solutions for every job type. If you’re wanting to elevate your welding game with Arc Solutions’s full range of Lincoln welding solutions, visit our collection here.


Back to blog

Blog

09.25.2023
Written by arcmaster

Oxy Fuel Cutting | Mastering Gas Cutting Torches

In recent years, gas cutting torches, better known as oxy fuel cutting, has taken a backseat to plasma cutting. However, oxy fuel cutting still carries great significance in the shop setting. 

Oxy fuel is good for a range of jobs because many torches can be outfitted for various tasks including welding, bending, brazing, heating and cutting. Oxy fuel is self-contained because it doesn’t require an electrical outlet or air compressor. Likewise, versatility of oxy fuel torches and its numerous abilities makes it an invaluable investment.

Oxy Fuel Cutting Techniques

Oxy fuel is a combination of oxygen and any fuel gas (typically propane, propylene, natural gas, acetylene, etc.) Oxy-acetylene is arguably the most popular in the oxy fuel cutting scene.  However, propane is more stable and easier to handle, making it a popular choice for hobbyists and small-scale cutting projects. In general, the choice of gas depends on the specific application and desired outcome.

Properties of Cutting Fuels:

  • Propane – Produces a lower flame temperature than acetylene but has about the same cutting speed.
  • Propylene – Requires an injector torch, and tends to have a heat source that is concentrated on the outside of the heat cone. 
  • Natural gas – Produces the lowest flame temperature, so it has the slowest cutting time.
  • Acetylene – Produces the highest flame temperature, resulting in faster speeds than the other gasses.

There are different types of oxy fuel cutting torches as well, based on the gasses being used:

  • The first of the two torch types is equal balance torch, which functions similarly to its name; it delivers the mixture of gasses all at an equal pressure. The equal balance torch is versatile and can use various fuel gasses, such as acetylene, propane, or natural gas. 
  • The second type of cutting torch is a fuel-injected torch, or a low-pressure torch, used for gasses delivered at low pressures. The fuel-injected torch uses acetylene as its fuel gas and is ideal for welding and brazing applications. It is essential to choose the right type of torch for your cutting application to ensure accurate and efficient cutting.

The Setup

We are focusing mainly on Oxy-acetylene cutting, as it is used the most often. There are a few things to keep in mind when working on your oxy fuel cutting skills. 

To master the technique, becoming familiar with the flames your torch puts off and what they are supposed to look like will give you a leg up in clean cuts. The are three different types of flames:

  1. Carburizing – This means there is TOO MUCH FUEL. Cutting with a carburizing flame creates carbon deposits along the cuts.
  2. Neutral – All the cones within the flame are equal and in the ideal state for cutting.
  3. Oxidizing –  This means there is TOO MUCH OXYGEN. When cutting with an oxidizing flame, your cut will leave porous zones on the metal. 

When you are setting up your torch and you have it lit, the first step is to make sure that your blue gas cones within your flame are all equal with and without the oxygen lever pressed. This will help ensure you’re ready to cut. 

You can also take a look at your torch flame and observe the length. A cutting torch with a nice clean cutting tip will have a nice long, even flame. A weak or short flame coming from the torch could be an indication that you need to clean your torch tip with a file and tip cleaner set. 

To get the best cuts, preheat your metal! By preheating your metal you are raising the temperature of the plate just before the cut to aid in the heat transfer and avoid cracking the metal plate. These two tips combined with steady travel speed and some practice will give you clean cuts in no time.  

Maintaining Your Torch 

It’s important to keep your torch well maintained, not only for your safety but also to ensure it’s always functioning at optimal efficiency.  As mentioned before, this is vital for achieving clean cuts and getting the results you want.  

The biggest things you want to avoid when oxy fuel cutting are burnback and flashbacks. Having torches with built-in safety features like the Victor Torch Kits is one way to help. If you don’t have these capabilities here are a couple things to keep in mind when maintaining your torch:

  • Clean your torch tip – Debris and residue can get inside your torch tip. This causes issues with the flame from your torch and how well it cuts. 
  • Check for leaks and replace worn parts – Apply a soapy water mixture to gas connections and watch for any bubbles that form. If bubbles do form this could be a sign of a gas leak. Replacing worn parts such as o-rings inside fittings with gas leaks or replacing hoses with tears or cracking helps eliminate gas leaks.
  • Proper storage – Be sure to store your torch, hose, and gas canisters in a dry, cool place. This will help prevent damage to all three mechanisms.

In the end you’ll see that carefully caring for your equipment will save you time and money in the long run. Whether it be your plasma cutter that we talked about in our last blog, maintaining your welding unit as discussed in the first blog, or your oxy fuel torch in this blog. Proper maintenance of your equipment expands the lifespan of your machinery and is one of the most valuable investments you can make. 

The Importance of Oxy Fuel Cutting

While oxy fuel cutting may have taken a backseat to plasma cutting in recent years, it remains a crucial tool in the workshop. The versatility of oxy fuel torches, which can handle welding, bending, brazing, heating, and cutting tasks, coupled with their self-contained nature, makes them a valuable investment. Understanding the different gas properties and selecting the right torch type are essential for efficient cutting. Mastering the technique involves recognizing the right flame characteristics and ensuring proper preheating. Maintaining your torch is key to achieving clean cuts and prolonging its lifespan. By taking care of your equipment, you’re not only saving time and money but also making a valuable long-term investment in your workshop’s success.
At Arc Solutions, we’re here to support your welding and cutting needs. Whether you need high-quality oxy fuel cutting equipment, expert advice, or maintenance tips, our team is ready to assist you. Visit our website today to explore our product offerings and discover how we can help you succeed in your workshop.


Back to blog

Blog

08.18.2023
Written by arcmaster

Unlocking the Power of Plasma Cutting: Techniques and Maintenance

The Rise Of Plasma Cutting

Plasma cutting has been around since before the 1970s but wasn’t widely accepted until the 1980s. Since the 80’s it has just continued to excel in popularity and innovation. Plasma cutting is a powerful tool that can be used in a multitude of industrial/manufacturing settings such as:

  • Fabrication
  • Automotive industry
  • Large structural or pipeline steel work

The speed of plasma cutting and its adaptability to multiple facets are what have helped it propel to one of the most desired shop utilities.

The Art Of Plasma Cutting

Plasma cutting sends an electrical arc through forced gas that is constricted, this raises the temperature high enough that the gas enters the 4th state of matter. The fourth state of matter is plasma. Plasma comes from inside of the nozzle down at a great force and an extreme heat to cut your metal. The gasses typically used in plasma cutting can be oxygen, nitrogen, argon or forced shop air. 

In Hypertherm Powermax 30 AIR 088096, there is a built-in air compressor within the machine. This Hypertherm plasma cutter does not require any shielding gas. With the Powermax 30 AIR it is as simple as plugging it into the wall , properly attaching your ground clamp to the material, picking up your torch and cutting! The built-in air compressor on this machine makes it highly portable and very attractive to anyone that is plasma cutting on the go. 

Some higher intensity plasma cutters that have been discussed in previous blogs (Hypertherm SYNC Plasma Cutters Role in Metal Cutting) are those of the Hypertherm SYNC series. With the latest in the industry technology, the SYNCs give you the ability to outperform other plasma cutting technologies. From the SmartSYNC® torches technology to the color coded, app-pairing consumables these machines leave all the guesswork out and help increase your project-to-project efficiency.

Effective Plasma Cutting Techniques

Tips and tricks to master these technologies almost sound too good to be true, because they are that simple to use. If you want clean, precise cuts with your plasma cutters you just have to make sure you’re checking this list. 

Tips To Clean And Precise Cuts:

  1. Familiarity With Your Machine: Make sure you are familiar with your machine and its capabilities. Choose a suitable project based on your machine’s abilities and available materials. Adjust materials or consumables if needed for optimal results.
  2. Consumable Health: Inspecting your consumables before tasks can prevent issues. Check them for proper functioning. SYNC cartridges indicate when to change consumables, saving time. If not using SYNC, refer to this list: swirl ring, electrode, nozzle, retaining cap, shield cap.
  3. Setting Adjustments: To find the right settings for your projects, practice cuts on the same material help you adjust amperage or heat. For thinner materials, a faster travel speed yields cleaner cuts.
  4. Torch Techniques: Hold the torch perpendicular to the metal for a straight cut. Use a cutting guide or straight edge if needed. Maintain a proper stand-off distance to avoid damage and ensure cut quality. Torch stand-off guides can be used for assistance.

Fun Fact: Hypertherm torches have a shield technology that isolates the nozzle from the metal, so you can drag the nozzle directly on the metal, with no worry about double arcing.

Maintaining And Troubleshooting Plasma Cutters: Q&A

Like the tips and tricks section, maintaining your plasma cutter is simple and will again feel too good to be true. A lot of the same general maintenance tips that we talked about in our first series, Equipment Maintenance: The Ultimate Guide For Welders, will apply to your plasma cutter. The main takeaways being:

  • Make sure your machine and consumables are clean and in good condition.
  • Inspect all cables and cords for breaks or wear to confirm good electrical flow. 
  • Monitor gas flow and coolant levels to help keep your machine cooled and running efficiently.

Let’s troubleshoot some scenarios:

Q: What do I do if my Hypertherm Powermax 30 AIR 088096 won’t strike an arc?

A:  Check your ground clamp or the surface your ground clamp is connected to. The ground clamp needs to be in decent condition and the surface it is connected to should be clean and free of debris. Things like paint, rust, and dirt will hinder the electrical flow to your equipment, making it difficult to strike an arc. 

An alternative problem could be that the gas flow to your torch is too high, creating a hard start. Excess gas pressure is something to be aware of because it can quickly deteriorate your consumables and damage your torch.

Q: What do I do if my Hypertherm SYNC65 083343 is burning through consumables?

A: Checking your gas flow could solve this problem. If the gas flow to your torch is too high it could cause your torch to hard start. Excess gas pressure can cause consumables, especially electrodes, to rapidly deteriorate. Also check the settings on your machine to ensure they are compatible with the consumables you are using and appropriate for the project. This is something to be gravely aware of as it can cause damage to not just your consumables, but your entire plasma system. 

Q: What do I do if my Hypertherm Powermax 45 088112 is producing excess amounts of dross?

A:  Similar to the last question, this is likely a settings issue. Double checking your amperage and gas flow, along with being mindful of the speed which you are cutting; could alone solve the problem. Another possible cause of dross is worn consumables that need to be replaced.

Revolutionizing Manufacturing: The Role Of Plasma Cutting

The role of plasma cutting in the world of manufacturing and industrial work is invaluable. Once you’ve taken the time to master your plasma cutting skills, the opportunities for increased efficiency, direct cost savings, and valuable shop time are endless. Keeping your cutting equipment in good working order, through regular maintenance, is the best way to extend machine longevity. 
In the final blog of our maintenance series we will discuss the best ways to maintain and utilize your oxy-fuel torch. Follow us on Facebook so you don’t miss out on all things new on equipment maintenance!


Back to blog

Blog

07.26.2023
Written by arcmaster

Equipment Maintenance: The Ultimate Guide For Welders

Regular equipment maintenance is key to increasing the longevity of its lifespan. In this series, we are going to go over how to maintain welding equipment (this blog), plasma cutters and oxy-fuel torches. The sole idea is to keep your equipment in tip-top shape to decrease downtime and increase output with maximum efficiency.

One thing you’ll notice if you’ve worked in a machine shop for any amount of time is when it gets hot during the summertime, machine downtime tends to increase. This also ties directly to the cleanliness of your equipment. In a welder there is a lot of build up from lubricants, metal shavings, grease and dirt, creating higher internal machine temperatures. The external heat only adds to the ‘fire’ so-to-speak, aiding in mechanical issues. Taking the time to properly inspect your welder will help you to identify potential causes for troubles. 

General Equipment Maintenance Tips

Unplugging And Allowing Rest Time

It’s very important that you FIRST unplug your machine and allow it to sit for 5 minutes before beginning an inspection. This is to avoid possible shock. Once that is done, you can find the side door/cover on your unit. Most weld machines have a door that you can open up or a side cover with screws that you can remove to get inside to repair the mechanical components of your welder. Taking a look inside to examine all the working parts often is a good way to get familiar with your machine. On heavily used equipment, you’ll likely see the build-up of debris mentioned earlier as soon as you open the door.

Preventing Grime Buildup

Things that you can do to prevent grime buildup in your Lincoln welders, your ESAB multi-process welders, or nearly any welding unit, are taking the time to thoroughly clean your machine. You can use an air hose to blow out any debris on the inside of the machine and wipe down with a dry rag. While cleaning your welder, examine control cables and weld cables that may need replacing. Signs of wear typically appear as cuts and cracks in the cables.

Maintaining The Weld Hood

Another thing that is always helpful when welding is to be sure you are changing your inner and outer lens on your weld hood. There is always a huge difference when going from an old dirty/scratched outer lens to a brand new lens. Regularly changing both the inner and outer lens of your weld hood is essential for better visibility and safety while welding. Old, dirty, or scratched lenses can impair your vision, leading to subpar welds and potential safety hazards.

Equipment Maintenance Checklist For Welders

  • Drive Rolls Inspection: Ensure that the drive rolls are still in good shape and functioning properly.
  • Fluid Levels Check (for engine drives): Inspect and maintain appropriate fluid levels in engine-driven welding equipment.
  • Filter Examination: Check and clean/replace air or oil filters to maintain proper ventilation and prevent contamination.
  • Contactor and Relay Inspection: Visually inspect contactors and relays for signs of arcing or damage, and address any issues found.
  • Fan Functionality: Verify that the cooling fans spin freely and are working efficiently to prevent overheating.
  • Debris and Oil Spills Removal: Thoroughly clean the inside of the machine, removing any debris or oil spills that may affect performance.
  • Consumables Check and Replacement: Regularly inspect and replace worn or damaged consumables, including tips, nozzles, diffusers, wire, liners, etc.

Periodically running through your equipment maintenance checklist should do the trick in helping maintain your welding equipment. A thought to remember is to not be afraid to check/replace your consumables (the same goes for the settings on your units). Sometimes a problem that is frustrating can be as simple as needing new consumables or adjustments in the weld settings.

Welding Equipment Troubleshooting Q&A

The ability to troubleshoot your equipment is also a good skill to learn. This skill comes with time and experience, and the longer you’ve welded the more familiar you’ll be with the issues that can occur. As mentioned before, it is a good idea to get familiar with your machine both inside and out. So, when an issue arises you have a better chance of nailing down what is the problem before it causes significant amounts of downtime.

Here are some troubleshooting scenarios with example machines, but do what applies in your case: 

Q: What do I do if my Lincoln Power MIG 215 is having trouble with poor weld quality?

A: The problem could be poor porosity, so be sure the surface you are welding is clean and the consumables you are using are appropriate, specifically your wire. Using a deoxidizer with the wire is a way to help control porosity.

Q: What do I do if the arc on my Lincoln Power MIG 211i is erratic?

A: You’ll want to begin with checking your input voltage to the machine. Take your time to check that cables are also working and there are no faulty connections. Another possible cause is incorrect type/size gun tip, also being sure the tip is damage free. While doing this it is helpful to double check over your gun to make sure it is in working order without breaks. You can also check your ground clamp for a weak connection.

Q: What do I do if my Lincoln POWER MIG 140 is having issues with unstable welds and arcing?

A: This could be much like the last issue. Do you have any faulty connections? Are your electrodes tightly connected to your lugs? (Connections that are loose can cause overheating and lead to fusions of metal, putting your machine in need for repair.) In this scenario, you can also check your ground clamp for a weak connection.

Key Takeaways Of Welder Equipment Maintenance 

Takeaways from the maintenance guide in a nutshell would be to ensure your welder and the surface you are welding are clean and clear of debris. Along with that, make sure all equipment and consumables are in good shape and not in need of replacement (such as cables, liners, drive rolls, nozzles, tips, and diffusers.) Taking the time often to run through a good maintenance checklist will help prevent your machine from going down and needing to be repaired. In our next series we are going to address the techniques and maintenance of plasma cutting machines. Stay tuned on our Facebook page for the debut of that blog!
Be proactive with your welding equipment and ask Arc Solutions about our Preventative Maintenance Program!


Back to blog

Blog

06.27.2023
Written by arcmaster

Hypertherm SYNC Plasma Cutter’s Role In Metal Cutting

The Technology: SYNC Machines And Plasma Cutters

All of the SYNC machines are equipped with some of the best plasma cutting technology, such as RFID (radio frequency identification) technology that helps the machine read messages from the SmartSYNC Torches based on the attached consumable cartridges. This allows the plasma cutter to automatically adjust to the correct amperage. These consumable cartridges come specific to the job.  To further the ease of use with these cartridges, Hypertherm has made them color-coded based on application:

  • Yellow – Drag Cutting
  • Gray – Mechanized / Stand Off
  • Green – Gouging
  • Black – FlushCut®

If you already happen to own a Duramax torch, there are limited capabilities. However, it is likely that with the right torch adapter, you could still benefit from some of the features that these revolutionary consumables offer. Another thing that is appealing about these single-piece cartridges is that they save customers, on average, $57/per consumable set. You save time and money instantly through the accuracy of the end-of-life detection offered through the RFID communication technology. Hypertherm’s dedication to innovation really gives consumers the best plasma cutters with the latest technology on the market!

Plasma Cutters: Material Types & Machine Options

The three variations of SYNC machines that we are exploring all have the ability to cut mild steel (FineCut high or low speed), stainless steel, and aluminum. Which machine is right for you is ultimately going to depend on the demand of the project. As you step up the Hypertherm plasma cutting ladder first with a SYNC 65, SYNC 85, and then SYNC 105, your capabilities will expand. 

Powermax65 SYNC

The first of the series is the Hypertherm Powermax65 SYNC. The SYNC 65 has the ability to cut up to 20mm or 3 ⁄ 4” and has a cut speed of 500 mm/min (20 ipm). This machine is the mildest performer of the 3 plasma cutters, but that doesn’t make it any less impressive. This machine would be more likely used for thicker metal sign cutting, doing some simple auto body work, or smaller projects around a fabrication shop. Personally, a SYNC 65 is likely a little more equipped than what a hobbyist would need just doing side jobs. However, it can certainly do all those side jobs and more, thus furthering its reputation in versatility. 

Powermax85 SYNC

The Powermax85 SYNC is the next in line as we step up the Hypertherm plasma cutter ladder.  This plasma cutter can cut up to 25mm or 1” and has a cut speed of 500 mm/min (20 ipm).  This machine can be considered as the happy medium. With its ability to cut a 1” thickness it proves itself to be a good choice for metal fabrication in an industrial setting or factory setting but it can do nearly all the same things as the Powermax65 SYNC, making it the shop workhorse. 

Powermax105 SYNC

The Powermax105 SYNC is the heaviest duty of the series line. This machine can cut up to 32mm or 1-1/4“ with a cutting speed of  500mm/min (20 ipm). The most common use for this machine model would be as an industrial plasma cutter, performing well in plasma cutting jobs for steel structural projects such as metal for bridges, car parks, and large pipework. This professional plasma cutter is best fitting for a much larger scale of industrial work.

Plasma Cutting Performance & Tips

When you begin to compare other plasma cutters on the market, it is a little harder to find something comparable to the SYNC series. There are plasma cutters that perform similarly to the SYNCs, but none of them come with the same perks. From the torches to the single-piece consumables, Hypertherm’s technology takes you to the next level in plasma cutting. The ease of use and application sells not only the SYNC series but all Hypertherm plasma cutters, elevating it above its competition. For example, when plasma cutting, a common tip you’ll usually get from a seasoned cutter is, “Use a stand-off guide to better your movement and get a good distance off your metal.” With Hypertherm you don’t need that trick because the torches are designed to electrically isolate the nozzle from the metal, thus eliminating double arcing. Another tip that the SYNC machines took into consideration and made their own is “checking setting adjustments.” With the new consumables you don’t need to worry about it, because once attached, the machines read them and adjust them for you! The opportunities provided by the technology Hypertherm offers you in their equipment make the possibilities endless.

Get your Hypertherm SYNC plasma cutter and enjoy 3-day shipping! 


Back to blog
Top